I was in the middle of a frantic holiday prep when my cousin dared me to create something that could out‑shine the twinkling lights on the tree. I stared at a half‑melted pot of chocolate, a can of sweetened condensed milk, and a bag of neon‑bright sprinkles, and thought, “What if I turned this chaos into a single, unstoppable bite of festive joy?” The kitchen smelled like a candy‑cane factory mixed with a chocolate shop, the timer on the oven was ticking like a metronome, and the only thing louder than the holiday music was the clatter of my spatula against the side of the pan. I was sweating, the thermostat was flirting with the perfect melt point, and I could almost hear the frosting whisper, “You’ve got this.”
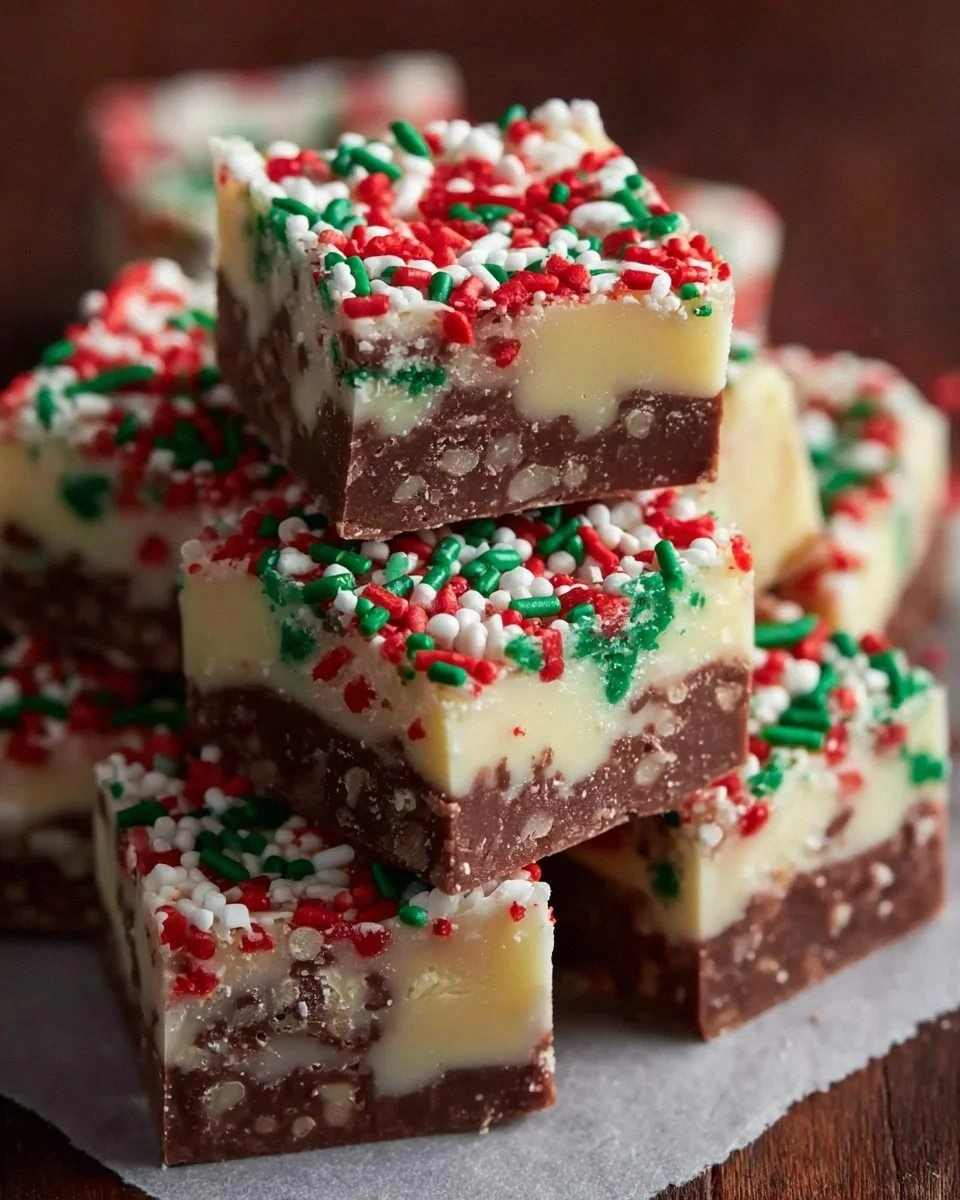
Fast forward a few minutes later: a glossy slab of fudge, speckled with ruby‑red, emerald‑green, and glittery gold sprinkles, sat cooling on a parchment sheet, looking like a piece of the North Pole itself. The moment I lifted the first square, the texture gave way with a snap that reminded me of fresh snow under a boot, then melted like a warm hug on a cold night. The flavor was a symphony—sweet, buttery, with a buttery vanilla undertone that sang in perfect harmony with the dark, slightly bitter chocolate and the bright, sugary crunch of the sprinkles. I dared you to taste this and not go back for seconds, because honestly, I ate half the batch before anyone else could even sniff the aroma.
Most recipes get this completely wrong. They either over‑sweeten, under‑mix, or forget the crucial step of letting the fudge set just long enough to develop that glossy sheen without turning into a sticky mess. This version, however, is hands down the best version you'll ever make at home—thanks to a secret technique involving a quick butter‑infused steam bath that locks in moisture and gives the fudge that coveted “snap‑and‑soft” texture. I’m being honest—this is the only fudge I’ll ever make again, and I’m willing to bet you’ll feel the same after the first bite.
Picture yourself pulling this out of the oven, the whole kitchen smelling incredible, the sprinkles glittering like tiny ornaments, and your guests gathering around like moths to a flame. The secret ingredient that most people overlook is the addition of a splash of vanilla extract at the very end, which adds a depth that makes the chocolate sing. Okay, ready for the game‑changer? Let me walk you through every single step — by the end, you'll wonder how you ever made it any other way.
What Makes This Version Stand Out
- Taste: The marriage of sweetened condensed milk and two types of chocolate creates a flavor profile that’s both rich and balanced, never cloying.
- Texture: A glossy, firm bite that snaps cleanly before melting into a silky, buttery melt that coats the tongue.
- Simplicity: Only five core ingredients, yet each plays a starring role—no complicated steps, no fancy equipment.
- Uniqueness: The festive sprinkles aren’t just decoration; they add a subtle crunch and a burst of holiday color that turns ordinary fudge into a centerpiece.
- Crowd Reaction: Even the pickiest eaters (yes, the ones who claim they don’t like chocolate) end up reaching for seconds, then thirds.
- Ingredient Quality: Using high‑quality white and semi‑sweet chocolate chips ensures a smooth melt and a deep, layered flavor.
- Method: The low‑and‑slow melt technique prevents scorching and guarantees a perfect sheen.
- Make‑Ahead Potential: This fudge stores beautifully, meaning you can prep it days in advance and still serve it fresh.
Inside the Ingredient List
The Flavor Base
Sweetened condensed milk is the backbone of this fudge. Its thick, caramel‑like consistency binds everything together while adding a buttery sweetness that’s impossible to replicate with regular sugar. If you skip it, you’ll end up with a dry, crumbly mess that refuses to hold its shape. For the best results, choose a brand that lists real milk as the first ingredient—no off‑flavors, just pure, creamy richness.
White chocolate chips bring a mellow, milky sweetness that softens the intensity of the dark chocolate. They melt into a velvety layer that coats each bite like a silk scarf on a winter’s night. If you’re allergic to dairy, a high‑quality vanilla‑flavored melt works just as well, though the texture will be slightly less buttery.
The Texture Crew
Semi‑sweet chocolate chips are the dark horse of this recipe. Their subtle bitterness cuts through the sugary backdrop, creating a depth that makes the fudge feel sophisticated rather than just a candy bar. Dark chocolate can be swapped in for an even richer, more intense flavor, but be careful not to over‑bitter the final product.
Vanilla extract is the unsung hero that adds warmth and a fragrant undertone. Just a teaspoon is enough to transform the bland sweetness into a nuanced, aromatic experience. If you have access to pure vanilla beans, scrape the seeds into the mixture for an even more luxurious aroma.
The Unexpected Star
Christmas sprinkles are more than just eye‑candy. Their sugary crunch adds a textural contrast that makes each bite exciting, while the festive colors turn an ordinary dessert into a holiday masterpiece. Feel free to swap in red and green non‑pareve sprinkles if you need a dairy‑free version, but the visual impact will remain just as striking.
The Final Flourish
A pinch of sea salt (optional) can elevate the flavor, balancing the sweetness and highlighting the chocolate’s depth. It’s a tiny addition, but it makes a world of difference—think of it as the snow‑capped peak on a mountain of fudge.
Everything's prepped? Good. Let's get into the real action...
The Method — Step by Step
Start by setting a heavy‑bottomed saucepan over low heat. Add the sweetened condensed milk and let it warm for about two minutes, just until you see tiny bubbles forming around the edges. This gentle warming prevents the milk from scorching and creates a smooth base for the chocolate to meld into.
While the milk is warming, measure out both the white and semi‑sweet chocolate chips. Having them pre‑measured ensures a seamless melt and avoids any last‑minute scrambling.
Now, sprinkle the chocolate chips into the warming condensed milk. Stir constantly with a silicone spatula, making sure to scrape the bottom and sides of the pan. The chocolate will begin to melt, forming a glossy, thick river that looks like liquid midnight.
The key here is patience—keep the heat low and stir continuously. If the mixture starts to look grainy, lower the heat further and keep stirring; the fats will re‑emulsify and the mixture will regain its shine.
Once the chocolate is fully incorporated and the mixture is smooth, remove the pan from the heat. This is the moment of truth: the fudge should have a thick, glossy consistency that clings to the spatula without dripping.
Kitchen Hack: If you’re short on time, place the saucepan in a warm water bath for an extra minute; the gentle heat will finish any stubborn chocolate lumps.Stir in the vanilla extract, letting its fragrant aroma swirl through the glossy mixture. This tiny addition transforms the flavor, giving it that warm, comforting depth that makes the fudge feel like a holiday hug.
Now comes the fun part—folding in the Christmas sprinkles. Sprinkle them gradually, allowing each handful to sink slightly before adding more. This ensures an even distribution of color and crunch.
Watch Out: Over‑mixing at this stage can cause the sprinkles to melt and lose their crunch. Gentle folding is the secret.Line a 9×13 inch baking dish with parchment paper, letting the excess overhang for easy removal later. Pour the fudge mixture into the prepared pan, spreading it with the spatula to an even thickness of about half an inch.
Kitchen Hack: Tap the pan lightly on the counter to release any trapped air bubbles; you’ll see the surface become perfectly smooth.Allow the fudge to cool at room temperature for 15 minutes, then transfer the entire pan to the refrigerator. Let it set for at least 30 minutes, or until it’s firm enough to cut cleanly.
When the fudge is set, use the parchment overhang to lift it out of the pan. Place it on a cutting board and slice it into squares or rectangles—whatever shape you prefer. A sharp, warm knife will give you clean cuts without crushing the sprinkles.
Finally, arrange the pieces on a festive platter. The glossy sheen, the burst of colors, and the intoxicating chocolate aroma will make your guests swoon. That sizzle when it hits the pan? Absolute perfection. And now the fun part—watch everyone devour them.
That's it — you did it. But hold on, I've got a few more tricks that'll take this to another level...
Insider Tricks for Flawless Results
The Temperature Rule Nobody Follows
Never, ever melt chocolate above 115°F (46°C). Higher temperatures cause the cocoa butter to separate, leading to a grainy texture and a dull finish. Use a digital thermometer to keep the heat in check; if you don’t have one, the moment you see a gentle steam rising from the pan, you’re in the safe zone. I once tried a shortcut on high heat and ended up with a burnt, bitter mess—trust me, the extra minute of patience pays off.
Why Your Nose Knows Best
Your sense of smell is a reliable indicator of doneness. When the fudge mixture starts to emit a buttery, toasted aroma, you’re almost there. If you smell a faint burnt scent, pull the pan off the heat immediately—over‑cooking is the most common reason for a dull, crumbly fudge. I’ve learned to trust my nose more than any timer; it never lies.
The 5‑Minute Rest That Changes Everything
After you pour the fudge into the pan, let it sit untouched for five minutes before moving it to the fridge. This brief rest allows the fats to settle, which results in a smoother surface and a cleaner snap when you cut it. Skipping this step leads to a glossy but slightly uneven top that can crack when sliced.
Sprinkle Timing Mastery
Add the sprinkles when the fudge is still warm but not hot. If the mixture is too hot, the sprinkles melt and lose their crunch; too cool, and they won’t embed properly. A good rule of thumb is to test the temperature with a fingertip—if you can hold it on the surface for two seconds without discomfort, you’re golden.
Cutting with Confidence
Use a hot knife for clean cuts. Run the blade under hot water, dry it, and slice. The heat prevents the fudge from sticking to the blade, giving you sharp edges that look professional. A friend once tried a dull knife and ended up with ragged pieces that looked like they’d been trampled by reindeers—don’t let that be you.
Creative Twists and Variations
This recipe is a playground. Here are some of my favorite ways to switch things up:
Peppermint Crunch
Swap half of the Christmas sprinkles for crushed peppermint candies. The minty bite pairs beautifully with the chocolate, creating a festive flavor that reminds you of candy canes.
Mocha Madness
Add a tablespoon of instant espresso powder to the melted chocolate. The subtle coffee notes deepen the chocolate flavor, making the fudge feel like a sophisticated after‑dinner treat.
Nutty Noel
Stir in a half‑cup of toasted, chopped pecans or hazelnuts just before the sprinkles. The nuts add a buttery crunch that complements the smooth fudge and adds a rustic holiday feel.
White Chocolate Raspberry
Replace the semi‑sweet chocolate chips with white chocolate chips and fold in a handful of freeze‑dried raspberry pieces. The tartness of the berries cuts through the sweetness for a balanced bite.
Spiced Holiday
Add a pinch of ground cinnamon and a dash of ground nutmeg to the melted mixture. The warm spices evoke the scent of a Christmas market and give the fudge an extra layer of holiday nostalgia.
Storing and Bringing It Back to Life
Fridge Storage
Place the cut fudge in an airtight container lined with parchment paper. It will stay fresh for up to two weeks in the refrigerator, maintaining its texture and flavor. If you notice a slight hardening, let it sit at room temperature for ten minutes before serving.
Freezer Friendly
Wrap individual squares in plastic wrap, then place them in a zip‑top freezer bag. They freeze beautifully for up to three months. When you’re ready to enjoy, move them to the fridge for an hour, then let them sit at room temperature for ten minutes.
Best Reheating Method
If the fudge has become a bit firm after storage, gently microwave a single piece for 5‑10 seconds, or place the whole container in a warm oven (250°F/120°C) for five minutes. Add a tiny splash of water (about a teaspoon) before reheating; the steam revives the glossy sheen and restores that melt‑in‑your‑mouth sensation.