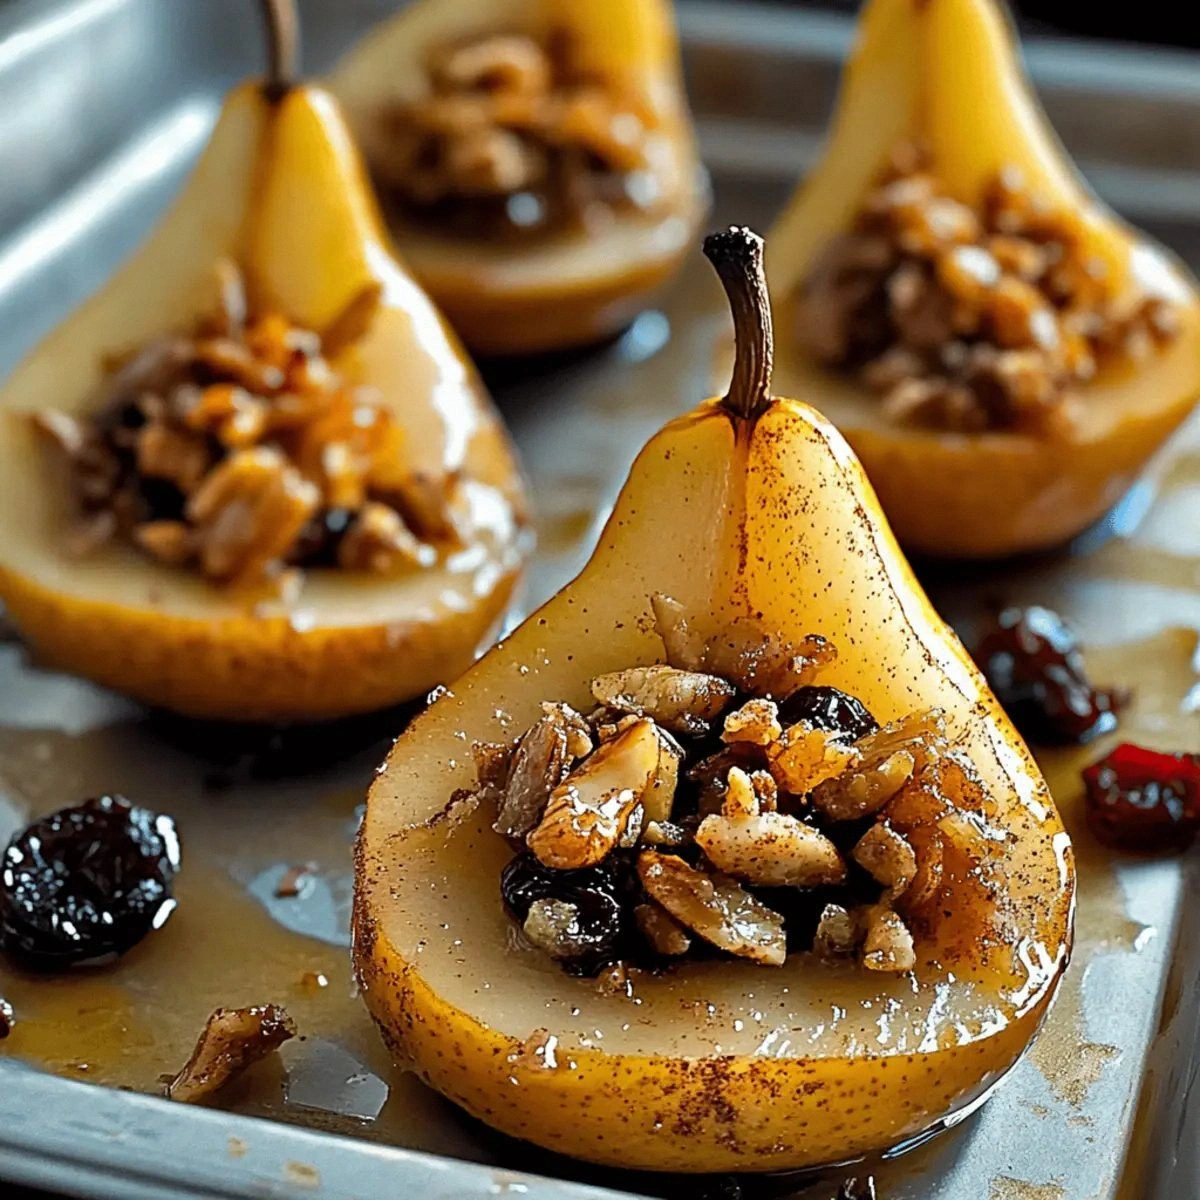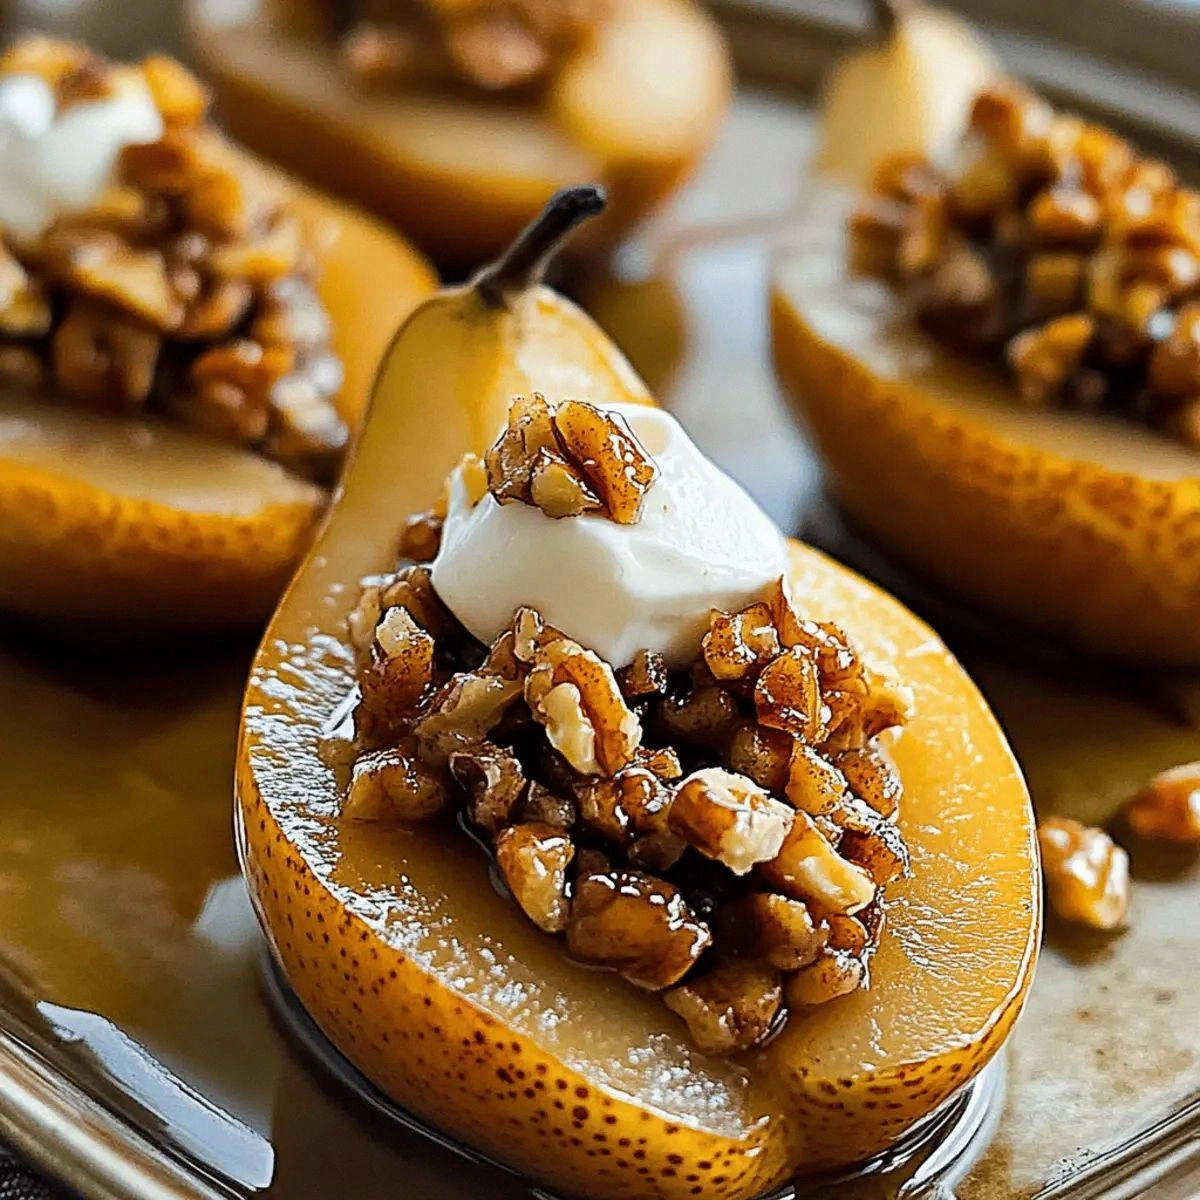
Last Tuesday I was supposed to be meal-prepping chicken and quinoa, but the market had parked a pyramid of Bosc pears right by the entrance, their russet skins catching the late-afternoon light like tiny lanterns. One sniff—warm honey, distant campfire, that whisper of autumn we all pretend we’re too busy to notice—and suddenly I was the person blocking traffic while cradling four perfect pears like newborn kittens. Fast-forward through a frantic text to my roommate (“Dinner delayed, pears happened”) and a cupboard raid that unearthed half a bag of walnuts, the last of the good cinnamon, and a suspiciously sticky honey jar. What emerged forty-five minutes later was not just baked fruit; it was a dessert that made me cancel my plans, turn off my phone, and eat two portions straight from the baking dish while standing at the counter in sock feet. The edges of the pears caramelize into silky pockets that taste like crème brûlée’s cooler cousin, while the nutty filling plumps and perfumes the whole kitchen with a spice-cloud so intoxicating the neighbors knocked to ask if I was burning artisanal candles. I dare you to taste this and not go back for seconds—actually, I double-dare you, because I ate half the batch before anyone else got to try it and I need someone else to confess to similar crimes. If you’ve ever struggled with dry, stringy baked pears that taste like hospital food, you’re not alone—and I’ve got the fix. Picture yourself pulling this out of the oven, the whole kitchen smelling like you hired a French pastry ghost, and your friends suddenly remembering they “were just in the neighborhood.” This next part? Pure magic.
Most recipes get this completely wrong. They treat pears like apples—blast them with sugar, drown them in syrup, then wonder why they collapse into tasteless mush. Here’s what actually works: you want the pear to be the star, not the supporting actor drowning in a pool of cinnamon-scraped sugar water. That means choosing the right pear (Bosc or Anjou, firm enough to hold a pocket but ripe enough to yield to a spoon), coring from the bottom so the elegant neck stays intact, and stuffing the cavity with a mixture that toasts itself while the fruit roasts, basting everything in nutty, honeyed butter. The texture contrast is what sends this over the edge—soft, scoopable pear flesh that tastes like wine-poached silk, against a filling that crackles and chews like the best granola cluster you ever stole from the bulk bin. Stay with me here—this is worth it.
And now the game-changer: instead of a watery syrup, we create a self-basting caramel that forms in the pan as the pears roast. A modest drizzle of honey meets the juices that drip from the fruit, mingles with the cinnamon and nut oils, and reduces into a glossy mahogany sauce thick enough to coat the back of your spoon like velvet. No extra pots, no reducing on the stove, no cornstarch slurry that tastes like elementary-school paste. The pears do the work while you pretend you’re a responsible adult who doesn’t eat dessert before dinner. Okay, ready for the game-changer? Let me walk you through every single step—by the end, you’ll wonder how you ever made it any other way.
What Makes This Version Stand Out
Velvet-Caramel Self-Forming Sauce: While the pears roast, honey and pear juices reduce into a glossy mahogany glaze that coats each half like liquid amber. No extra pans, no guesswork—just pour and swoon.
Stuffing That Toasts Itself: The nut mixture goes in raw and emerges deeply golden, fragrant with cinnamon and honey, creating a crunchy-sandy heart that contrasts the molten fruit. Your kitchen will smell like a chalet in the Alps and your smoke alarm will stay eerily silent.
Bottom-Up Core Removal: By scooping from the underside, the pear keeps its elegant silhouette, so you get restaurant-plate drama without any puff pastry or culinary school tuition.
One-Pan Weeknight Luxury: Everything bakes on a single sheet, meaning you can start after work and still have time to binge your comfort show while it roasts. Cleanup is literally one pan and maybe the spoon you licked.
Make-Ahead Friendly: Roast early, reheat gently, and serve with ice cream that melts into the hot crevices like vanilla lava. Thanksgiving hosts, I see you panicking—this is your secret weapon.
Crowd Gas Guarantee: I’ve served this to self-proclaimed “I don’t like cooked fruit” skeptics and watched their eyes widen like kids at a magic show. Bold claim: this is hands down the best version you’ll ever make at home.
Alright, let's break down exactly what goes into this masterpiece...
Inside the Ingredient List
The Flavor Base
Pears are the diva here, and like any prima donna they demand the right stage. Bosc brings honeyed intensity and a long neck that looks dramatic on the plate; Anjou is buttery and mild, perfect if you want the filling to shout louder. Pick specimens that feel heavy for their size and smell like autumn air in New England. Skip any with bruises or wrinkled necks—they’ll collapse into woolly sadness. If all you can find are Bartletts, reduce baking time by five minutes and watch them like a hawk; they soften faster than my resolve at a sample station.
Cinnamon is the co-star, but not the chalky stuff that’s been languishing in your spice rack since the Obama administration. Buy a fresh jar, or better yet, grate Ceylon quills yourself; the aroma is like red-hot candy meets orchard bark, and the flavor blooms rather than punches. One teaspoon is all you need—this is accent, not smother. If you skip it, the dessert still works, but it’s like watching a rom-com without the meet-cute: edible, yet oddly hollow.
The Texture Crew
Nuts provide the crunch backbone. Walnuts give earthy bitterness that keeps the honey in check, pecans add buttery Southern charm, and almonds deliver a clean, wine-pairing sophistication. Toast them lightly in a dry pan for three minutes before chopping; that sizzle when they hit the metal? Absolute perfection. If someone at the table has a nut allergy, substitute pumpkin seeds and sunflower seeds in equal measure—you’ll lose some fat but keep the snap, and the color confetti is gorgeous.
Optional dried fruits are the stealth bombs of chewy sweetness. Golden raisins plump into tiny spheres that burst like honey grapes; dried cranberries bring tart fireworks that cut through all the caramel coziness. Chop them roughly so they distribute evenly; nobody wants a single raisin the size of a golf ball hijacking a bite.
The Unexpected Star
Honey is more than sweetener—it’s liquid seasonality. Orange-blossom honey perfumes the pears with citrus ghosts, wildflower honey tastes like a meadow in July, and buckwheat honey adds molasses swagger that makes the whole dessert taste older and wiser. Warm the jar in a bowl of hot water for thirty seconds so it pours like liquid silk; cold honey fights you, sticks to the measuring cup, and generally behaves like a toddler past bedtime.
The Final Flourish
Whipped cream should be soft-peaked and barely sweetened; you want cloud, not candy. Vanilla ice cream is classic for a reason—those first drips that slide into the hot pear cavity create a cinnamon-vanilla river you’ll chase with your spoon like a kid after the last school-bus seat. For dairy-free friends, coconut cream whipped with a whisper of maple syrup gives tropical hammock vibes that somehow still feel autumnal. Don’t skip the flourish; it’s the dessert equivalent of the bow on a gift box.
Everything's prepped? Good. Let's get into the real action...
The Method — Step by Step
- Preheat your oven to 375°F (190°C). Position a rack in the center so the pears roast, not scorch. While the oven heats, line a small rimmed baking sheet with parchment—cleanup should be the least memorable part of this adventure. Give the parchment a quick flick of nonstick spray; honey is delicious, but it’s also the world’s most stubborn sticker. That gentle whoosh when the oven door opens? Future-you smelling success.
- Slice a tiny sliver off the bottom of each pear so they stand upright without wobbling like tipsy penguins. Using a melon baller or teaspoon, core from the underside, hollowing a cavity about an inch wide and two inches deep—think of carving a pumpkin, but daintier. Leave the stem intact; it’s the built-in handle for dramatic plating later. If you pierce through the top, no panic—just rotate the pear so the hole faces the back of the serving plate and carry on like the professional fraud you are.
- Combine the nuts, cinnamon, honey, and dried fruits in a small bowl. Stir with a fork until the mixture clumps like wet sand that refuses to build a castle. Taste a pinch; it should feel like trail mix that went on a spa retreat and came back enlightened. If it’s too dry to hold together, drizzle another teaspoon of honey; too wet, add a few more chopped nuts. This is the stuffing that will perfume your whole house—do not attempt with a stuffy nose, you’ll miss half the experience.
- Pack the stuffing firmly into each pear cavity, mounding slightly on top. The honey will melt and glue everything together, so press like you mean it. Stand the pears on the prepared sheet, leaving at least an inch between them so steam can escape and turn into gorgeous caramel instead of sad pear soup. Drizzle any remaining honey mixture over the tops; it will drip down and start the self-basting magic. Slide the sheet into the oven and set a timer for 25 minutes—do not wander off, the aromatics start at minute twelve and you’ll want to bask.
- After 25 minutes, check for doneness: a paring knife should slide through the thickest part with zero resistance, and the tops should look bronzed like beach-goers in September. If the nuts are browning too quickly, tent loosely with foil and bake five minutes more. The pears will hold their shape but slump slightly, as if sighing after a long day. Remove from the oven and let rest five minutes; they finish cooking from residual heat and the sauce thickens to the perfect drizzle consistency. This is the moment of truth—try not to poke at them like a kid testing Christmas presents.
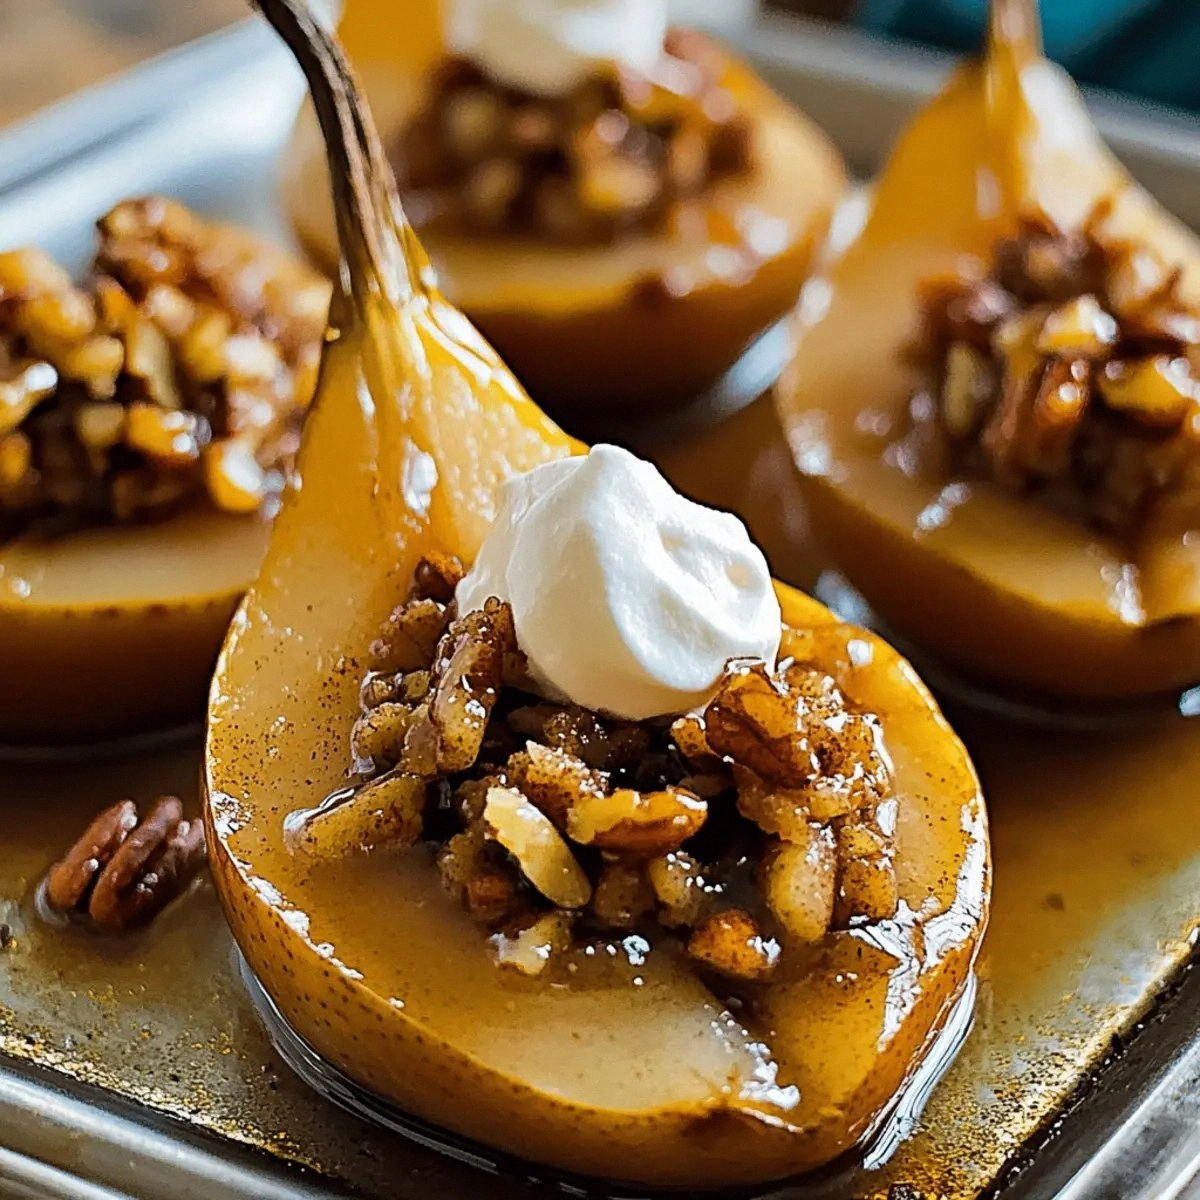
- Serve warm on small plates with a generous spoonful of the pan sauce. Add whipped cream or ice cream alongside, not on top—you want the first bite to be pure pear and spice, the second a swirl of hot-meets-cold nirvana. Garnish with a light dusting of cinnamon or a few chopped nuts that escaped the stuffing for texture contrast. Sit down, take the first spoonful, and accept that you’ll be making this every week until spring.
That's it—you did it. But hold on, I've got a few more tricks that'll take this to another level...
Insider Tricks for Flawless Results
The Temperature Rule Nobody Follows
Your pears should be cool when they go into the oven. Cold fruit heats slowly, allowing the filling to toast and the sugars to caramelize before the flesh turns to mush. If your kitchen is tropical and the pears feel lukewarm, refrigerate them stuffed but uncovered for 15 minutes while the oven preheats. I learned this the hard way after a batch emerged like pear pudding with raw nuts—edible, but a textural tragedy.
Why Your Nose Knows Best
Trust aroma over timers. When the honey hits the edge of the pan and starts to foam, it smells like someone toasted a cinnamon roll on a campfire—deep, nutty, almost smoky. That’s your cue to peek. If you wait for the timer out of blind obedience, the sauce may tip from mahogany to bitter charcoal. A friend tried skipping this step once—let’s just say it didn’t end well, and her smoke detector still holds a grudge.
The 5-Minute Rest That Changes Everything
Resting is non-negotiable. The honey needs time to re-absorb steam from the pears, turning from thin syrup into glossy lava. Cut one open too soon and it bleeds out like a crime scene; wait five minutes and the sauce clings like expensive mascara. Cover loosely with foil if your kitchen is drafty, but don’t seal—steam will murder that coveted crunch.
Creative Twists and Variations
This recipe is a playground. Here are some of my favorite ways to switch things up:
Chocolate Chai Pear
Swap 1 tablespoon of honey for dark maple syrup and tuck a square of 70% chocolate into the center of each nut pile. As it melts, it forms a molten core that mingles with cinnamon and creates a mocha-chai aroma. Top with espresso-spiked whipped cream and you’ve got dessert and after-dinner coffee in one swoop.
Savory Cheese Accent
Add a teaspoon of crumbled blue cheese to the stuffing for sweet-salty fireworks. Sounds weird, tastes like you hired a Michelin sommelier—pears and cheese are classic on a cheese board, and the honey bridges the gap like diplomatic dessert relations. Serve with port for extra swagger.
Coconut-Cardamom Vacation
Replace cinnamon with ½ teaspoon ground cardamom and use toasted coconut flakes instead of nuts. Drizzle with lime-scented coconut cream and suddenly you’re in a Thai beach hut watching monsoon rain. It’s fall for your taste buds, summer for your imagination.
Breakfast Oatmeal Boat
Pack the cavity with a mix of oats, butter, and brown sugar. Bake as directed, then serve warm with a splash of cold milk poured into the center—the contrast is like cereal gone to grad school. It’s dessert masquerading as breakfast, and nobody complains.
Storing and Bringing It Back to Life
Fridge Storage
Refrigerate leftovers in an airtight container up to four days. Place a piece of parchment directly against the cut surface to prevent the pears from oxidizing into sad beige hockey pucks. They’ll taste great chilled, but the sauce firms to honey-candy; plan to reheat gently.
Freezer Friendly
Freeze individual pears on a tray until solid, then transfer to a zip bag with as much air sucked out as your lungs allow. They keep two months without flavor fade. Thaw overnight in the fridge, then reheat as below. Texture softens slightly, but the flavor is still swoon-worthy on a random Tuesday when you need a hug in edible form.
Best Reheating Method
Warm in a 300°F oven for 12 minutes, adding a tiny splash of water to the pan to create steam that re-hydrates the pears without turning them to mush. Microwave works in a pinch—thirty seconds on 50% power, covered with a damp paper towel—but you’ll sacrifice the crunchy nut crown. Either way, finish under the broiler for one minute to resurrect that fresh-roasted aroma.