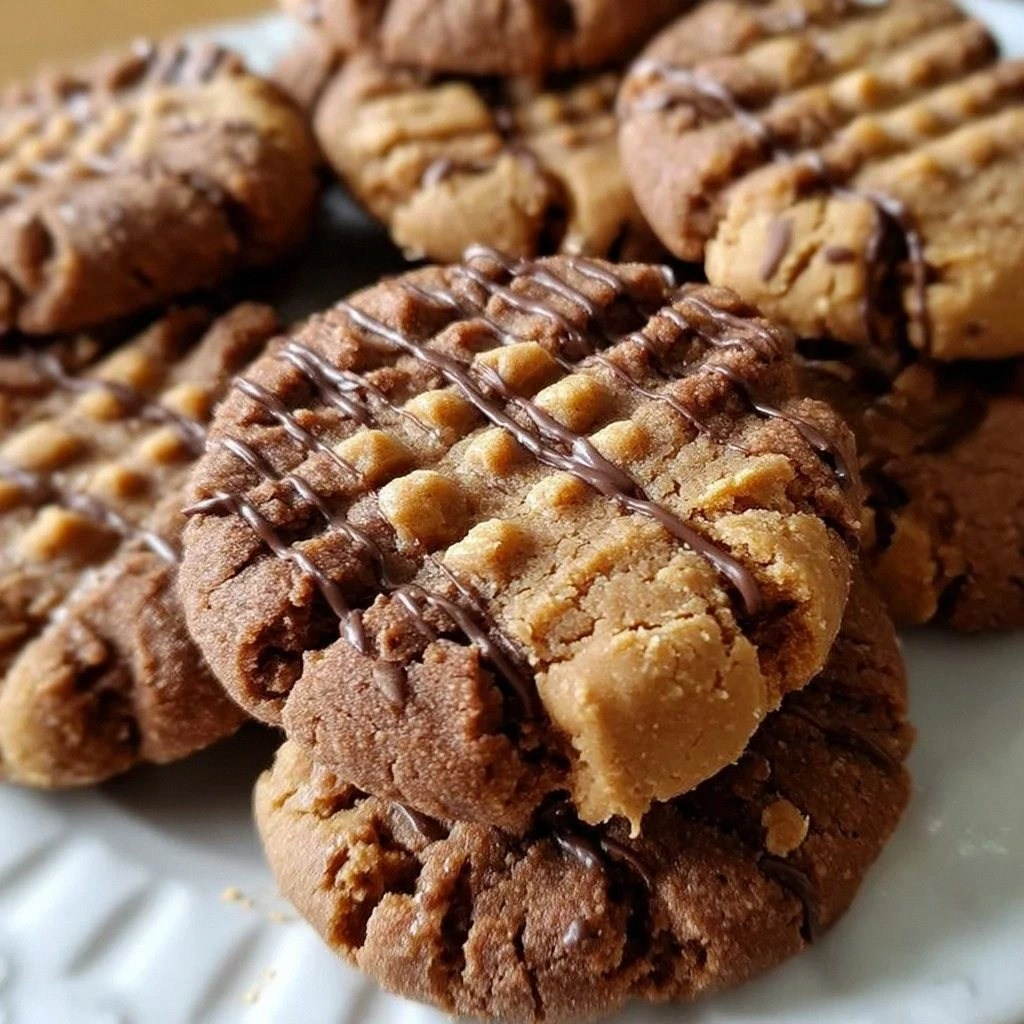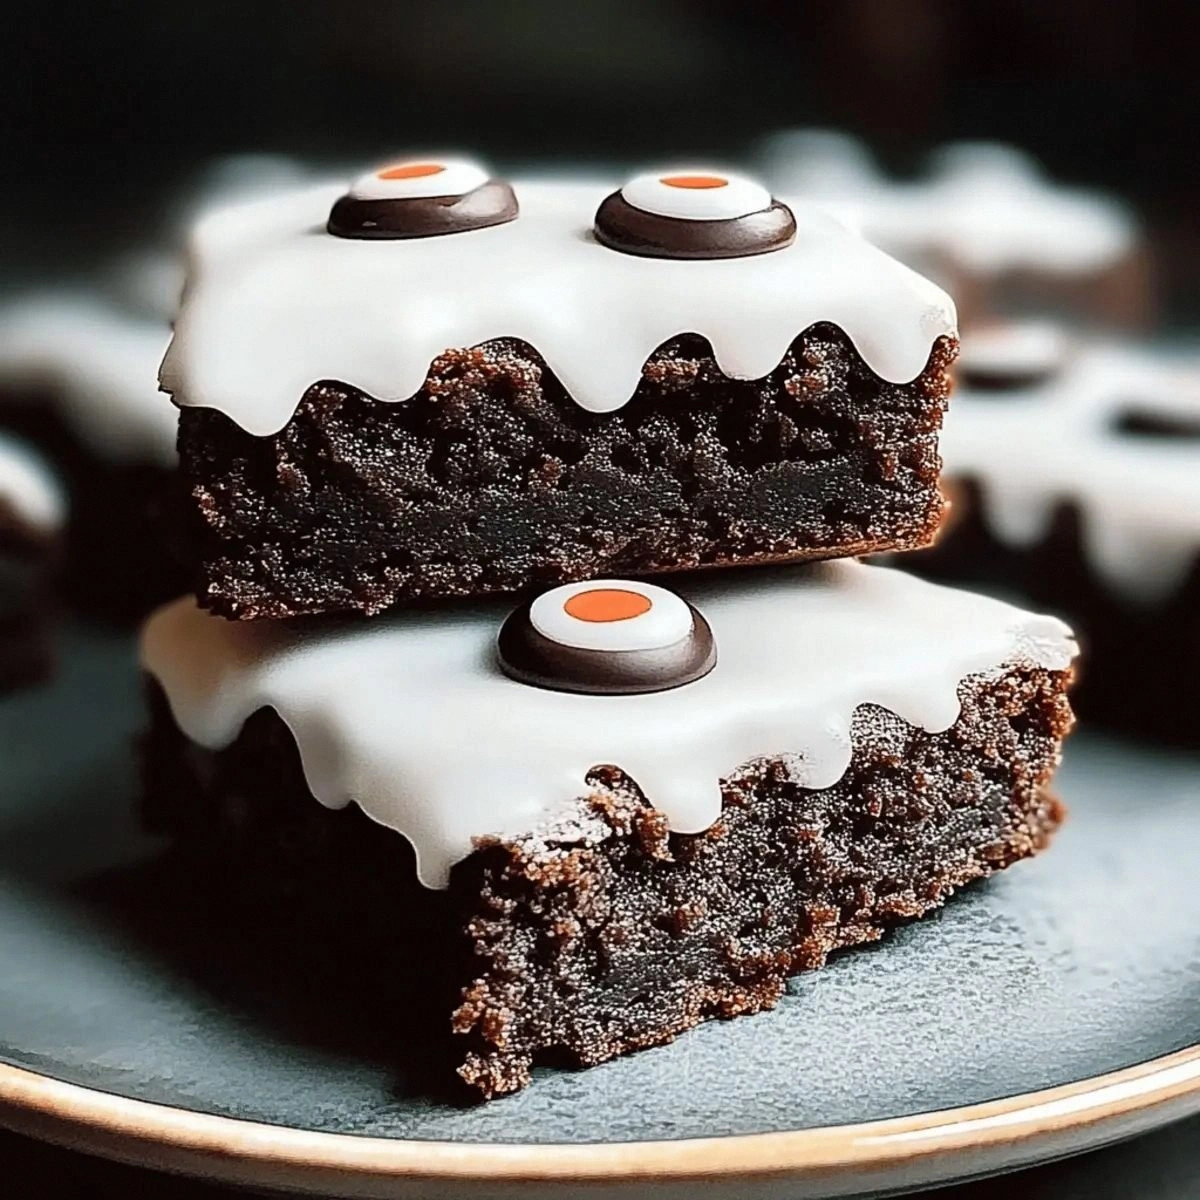
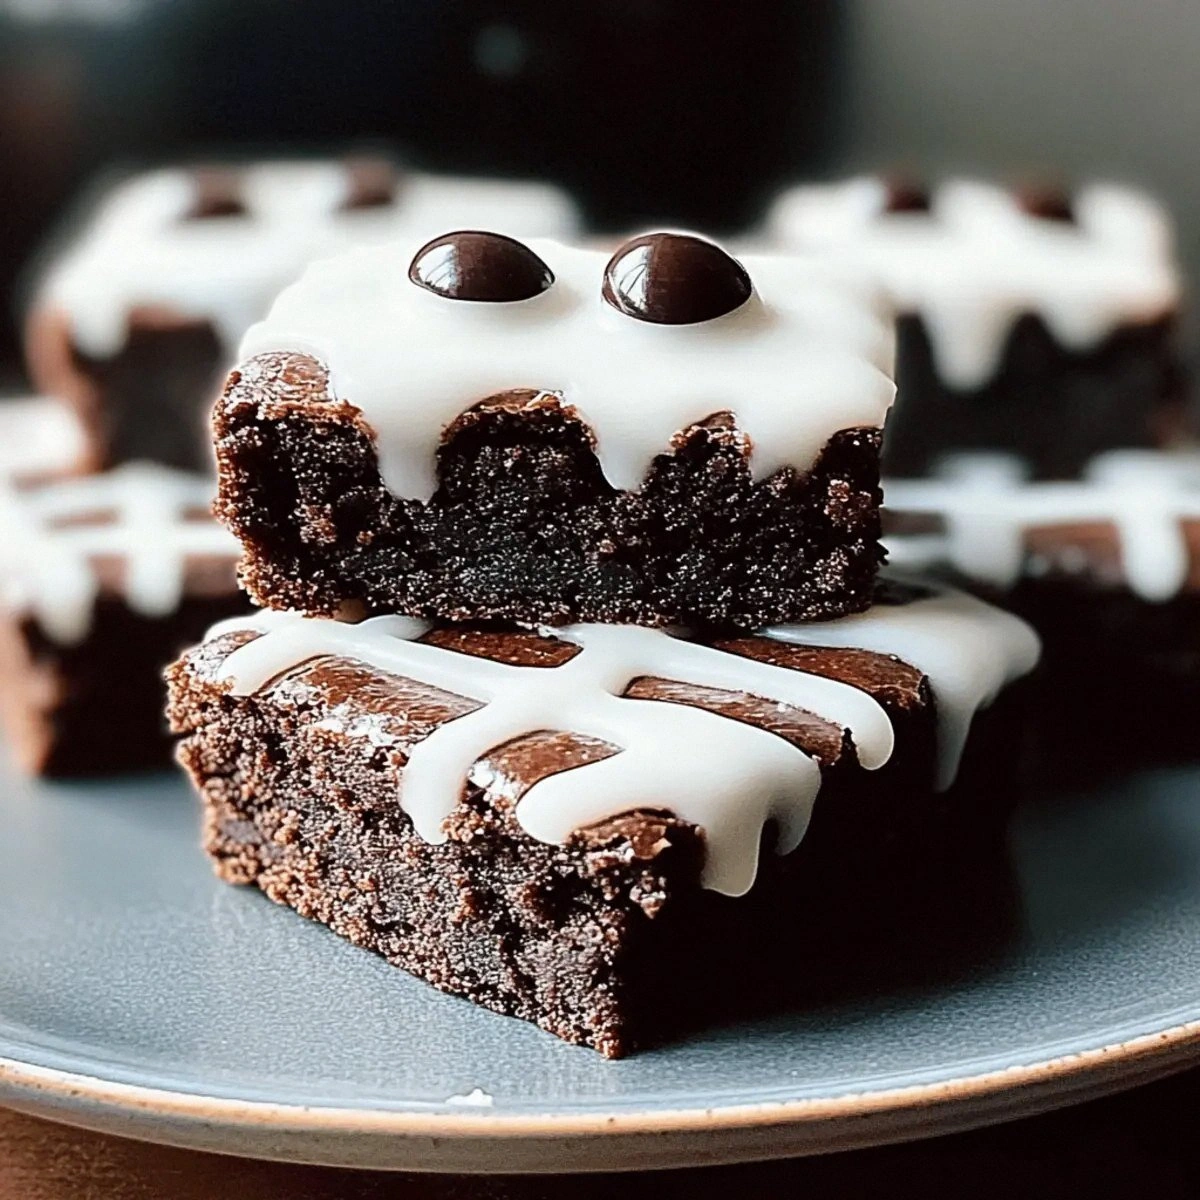
I still remember the Halloween when my kitchen looked like a crime scene — powdered sugar everywhere, melted chocolate dripping off the counter, and me frantically trying to pipe "mummy wraps" on brownies that looked more like sad spaghetti. My friends were arriving in twenty minutes, and my so-called "spooky treats" were a disaster. Fast forward to today, and I've cracked the code on the most ridiculously delicious, eye-catching, foolproof mummy brownies that'll make you look like a pastry wizard even if you can barely spell ganache. The secret? It's not about perfect piping skills or fancy equipment — it's about knowing exactly when to let the brownie do its thing and when to swoop in with the white icing magic.
Picture this: it's a crisp October afternoon, your kitchen smells like a chocolate factory had a baby with a vanilla bean farm, and you're pulling out a pan of brownies so fudgy they make regular cakey brownies feel personally attacked. The edges are crackly like the top of a crème brûlée, the center jiggles just enough to let you know it's going to be molten chocolate heaven, and you're about to transform these beauties into adorable mummy faces that'll have kids and adults fighting over the last piece. That first bite? Pure autumn comfort — deep cocoa flavor that tastes like someone captured Halloween night in chocolate form, with sweet vanilla icing that melts on your tongue like October frost.
What makes these mummy brownies different from every other Halloween recipe cluttering your feed? I'm about to share the technique that changed everything for me — the one that stopped my brownies from turning into dry chocolate bricks and started making them the stuff of legend. We're talking about the perfect ratio of cocoa to butter that creates that shiny, paper-thin crust on top, the temperature trick that keeps them fudgy for days, and my favorite part: the simple zig-zag icing method that creates perfect mummy bandages without any pastry bags or artistic talent required. If you've ever struggled with brownies that cake up like chocolate cornbread or icing that slides off like sad snow, you're about to have your mind blown.
Let me walk you through every single step — by the end, you'll wonder how you ever made it any other way.
What Makes This Version Stand Out
Ultra-Fudgy Texture: Most brownie recipes fail because they treat cocoa powder like flour and end up dry and crumbly. This version uses cocoa as the star, creating a dense, truffle-like interior that stays moist for four days (though good luck having them last that long). The melted butter and precise egg ratio create that coveted shiny crust that cracks perfectly under your fork.
One-Bowl Simplicity: Forget separating eggs, melting chocolate over double boilers, or dirtying every bowl in your kitchen. Everything mixes in one bowl in under five minutes, making this perfect for last-minute Halloween parties when you realize you promised to bring dessert but forgot until the morning of.
Fail-Proof Icing Technique: The mummy bandages aren't about steady hands or artistic skills — it's all about the right icing consistency and a simple sandwich bag trick. Even my friend who once decorated cookies to look like roadkill managed to make these look adorable (her words, not mine).
Crowd-Pleasing Flavor Balance: The brownies aren't overly sweet, which means the icing adds just the right amount of sugary contrast without sending anyone into a sugar coma. Kids love the fun design, adults appreciate that they taste like premium chocolate, and everyone fights over the corner pieces.
Make-Ahead Magic: These actually taste better the next day once the flavors meld, making them perfect for busy Halloween week when you've got costumes to finish, pumpkins to carve, and a million other things on your plate. Bake them Tuesday, ice them Wednesday, serve them Friday — they'll be even better.
Year-Round Versatility: Once Halloween passes, skip the mummy design and you've got the ultimate base brownie recipe for birthdays, potlucks, or Tuesday nights when you need chocolate therapy. Add nuts, swirl in peanut butter, or top with ice cream — this recipe plays well with every variation.
Alright, let's break down exactly what goes into this masterpiece...
Inside the Ingredient List
The Flavor Foundation
Unsweetened cocoa powder is the heart and soul of these brownies, and not all cocoa is created equal. I'm talking about the deep, dark stuff that makes your kitchen smell like a chocolate factory when you open the tin. The one cup measurement might seem excessive, but it's what creates that intense chocolate flavor that makes people close their eyes when they take a bite. Skip the Dutch-processed cocoa here — we want the natural acidity to balance the sweetness and create that perfect crackly top. If all you have is Dutch-processed, add a teaspoon of white vinegar to wake up the flavor, but natural cocoa is what makes these brownies sing.
Granulated sugar isn't just for sweetness — it's the secret weapon behind that shiny, tissue-thin crust on top. The sugar dissolves partially during baking, then recrystallizes as the brownies cool, creating that prized papery layer that serious brownie enthusiasts judge recipes by. One cup hits the sweet spot where the brownies taste indulgent but not cloying, letting the chocolate flavor shine through. Don't try to reduce it unless you want sad, flat brownies that taste like chocolate-flavored cardboard.
The Texture Crew
All-purpose flour is the supporting actor here — we need just enough to give the brownies structure without turning them into chocolate cake. Half a cup might seem stingy, but it's the bare minimum needed to hold everything together while still keeping that fudgy interior. Over-measure your flour and you'll end up with cakelike brownies that taste like they came from a boxed mix. Spoon and level it, don't scoop from the bag, or you'll pack in up to 30% more flour than intended.
Large eggs are the binding superheroes that create that perfect chewy edge while keeping the center molten. Two eggs provide just enough protein to set the brownies without making them rubbery. Take them out of the fridge 30 minutes before baking — room temperature eggs mix more evenly and create a smoother batter. In a pinch? Place cold eggs in warm water for five minutes while you prep your pan.
The Richness Factor
Melted unsalted butter is what separates good brownies from legendary ones. The half cup measurement gives us that perfect fat-to-flour ratio that creates brownies so rich they make chocolate truffles jealous. Melt it first so it cools slightly — hot butter will scramble your eggs and create weird chunks in your batter. Don't substitute oil here; butter's milk solids contribute to that crackly top and add depth that neutral oils can't match.
The Final Flourish
White icing isn't just decoration — it's the sweet vanilla contrast that makes the chocolate taste even deeper by comparison. One cup gives you enough to create whimsical mummy bandages with some left over for "quality control" tasting. The key is getting the right consistency: too thin and it'll slide off, too thick and it won't pipe smoothly. Add milk a teaspoon at a time until it flows like honey from a spoon.
Everything's prepped? Good. Let's get into the real action...
The Method — Step by Step
- Preheat your oven to 325°F (not 350°F — this lower temperature is crucial for fudgy centers). Line an 8-inch square pan with parchment paper, leaving wings hanging over the sides so you can lift the brownies out like a chocolate slab of gold. Spray the parchment with nonstick spray, especially in the corners where brownies love to stick and break apart. This temperature might seem low, but it's the difference between brownies that stay fudgy for days and ones that turn into chocolate-flavored sawdust by tomorrow.
- Melt your butter in a medium bowl — I microwave it in 30-second bursts until it's liquid gold but not boiling hot. Let it cool for exactly three minutes while you gather the rest of your ingredients. Hot butter will scramble your eggs and create weird curdled bits that never fully incorporate. You want it warm enough to keep the cocoa happy but cool enough that you can stick your finger in without yelping.
- Whisk the cocoa powder into the melted butter until it forms a thick, glossy paste that looks like melted chocolate bars. This step blooms the cocoa, releasing all those complex chocolate flavors that make people ask if you used expensive European chocolate. Keep whisking until no dry pockets remain — those stubborn lumps will haunt your final brownies with dry, bitter spots. The mixture should be so dark it absorbs light like a chocolate black hole.
- Add the sugar and whisk until the mixture looks like wet sand at the beach — grainy but cohesive. The sugar will start dissolving in the warm butter, creating the foundation for that coveted shiny crust. Don't rush this step — give it a full minute of whisking to start the sugar dissolution process. Your arm might complain, but your taste buds will thank you later.
- Crack in the eggs one at a time, whisking each one in completely before adding the next. The batter will transform from thick and gritty to smooth and glossy, like chocolate pudding that's been to finishing school. This is where the magic happens — the eggs create the structure that gives you chewy edges and a fudgy center. If your eggs are cold, the batter might seize up and look curdled. Don't panic — just let the bowl sit for two minutes and whisk again until smooth.
- Stir in the flour with a spatula, not the whisk — we want to mix just until the last flour streaks disappear. Over-mixing develops gluten and creates tough, cakelike brownies that taste like chocolate-flavored bread. Fold from the bottom of the bowl, turning the batter over itself like you're making chocolate origami. Stop as soon as you don't see dry flour — the batter should be thick and fudgy, like chocolate frosting that's been left in the sun.
- Pour the batter into your prepared pan and spread it to the corners with your spatula. Drop the pan from two inches height onto the counter three times — this releases air bubbles that create weird holes in your brownies. Smooth the top so it's level; uneven batter bakes unevenly, leaving you with overcooked edges and raw centers. The batter will be thick and reluctant, like it's too good for the pan, but coax it gently to the edges.
- Bake for exactly 25-30 minutes, rotating the pan halfway through. The edges should look set and slightly pulled away from the pan, while the center still jiggles like chocolate Jell-O when you shake the pan. A toothpick inserted two inches from the edge should come out with a few moist crumbs — not wet batter, but not clean either. Remember: brownies continue cooking from residual heat, so pull them when they look underdone and let them finish setting in the pan.
- Cool completely in the pan on a wire rack — I know, waiting is torture when your kitchen smells like Willy Wonka's factory. But cutting warm brownies is like cutting warm cheese: they smush and stick to your knife, creating ragged edges that ruin your mummy design. Give them at least two hours, or speed things up by placing the pan in the fridge for 45 minutes after it's no longer hot to the touch.
- Lift the brownies out using the parchment wings and place them on a cutting board. Use a sharp knife warmed under hot water to cut clean squares — wipe the blade between cuts for bakery-perfect edges. Now comes the fun part: spoon your white icing into a sandwich bag, snip a tiny corner, and pipe zig-zag bandages across each brownie. Add candy eyes or use chocolate chips for pupils, and watch your mummies come to life faster than you can say "trick or treat."
That's it — you did it. But hold on, I've got a few more tricks that'll take this to another level...
Insider Tricks for Flawless Results
The Temperature Rule Nobody Follows
Here's the thing that separates brownie legends from brownie disasters: your oven thermometer is probably lying to you. Most home ovens run 25-50 degrees off, which means your "325°F" might actually be 375°F, turning your fudgy dreams into chocolate-flavored hockey pucks. Invest in an oven thermometer — they're five dollars and will save you from more cooking disasters than I can count. If your brownies consistently come out dry even when you pull them early, your oven is running hot. Adjust accordingly and watch your baking transform from frustrating to foolproof.
Why Your Nose Knows Best
Your kitchen timer is helpful, but your nose is the ultimate brownie-baking tool. When the cocoa and butter start creating that deep, chocolate aroma that makes you involuntarily close your eyes, you're about 3-4 minutes away from perfect doneness. This is when the edges start pulling away from the pan and the center has that slight jiggle. Trust your senses over the clock — every oven is different, every pan conducts heat slightly differently, but that chocolate aroma is universal. If you wait for the timer and ignore what your nose is telling you, you'll overbake every single time.
The 5-Minute Rest That Changes Everything
After you pull the brownies from the oven, let the pan sit undisturbed for exactly five minutes before moving it to a cooling rack. This brief rest allows the carryover cooking to finish setting the centers without overbaking the edges. It's like letting a steak rest — those five minutes let the heat distribute evenly, creating that perfect fudgy texture from edge to center. During this time, the brownies finish baking themselves to chocolate perfection while you resist the urge to dive in with a fork. Good things come to those who wait, and these five minutes are the difference between good brownies and life-changing ones.
The Parchment Paper Trick That Prevents Heartbreak
Leave two inches of parchment paper hanging over two opposite sides of your pan — these become your lifting handles later. But here's the genius part: crumple the parchment paper into a ball first, then smooth it out. This softens the paper so it molds perfectly to the pan corners, preventing the brownie tragedy of half your batch sticking to unreachable corners. The crumpling also creates tiny air pockets that help with even baking. Your future self will thank you when you lift out perfect chocolate squares instead of chiseling stuck brownies from the pan like an archaeologist.
Creative Twists and Variations
This recipe is a playground. Here are some of my favorite ways to switch things up:
Peanut Butter Swirl Mummies
Dollop 1/3 cup peanut butter across the batter before baking and drag a knife through to create marbles. The peanut butter adds protein that keeps the brownies extra moist while creating beautiful swirls. After they cool, pipe your mummy bandages with white icing, then add mini Reese's Pieces for eyes. The sweet-salty combination makes these disappear faster than Halloween candy in October.
Salted Caramel Drizzle Monsters
Replace the white icing with a simple caramel sauce (melt 1/2 cup sugar until amber, whisk in 1/4 cup cream and a pinch of salt). Let it cool slightly, then drizzle in bandage patterns. The caramel sets into chewy ribbons that contrast beautifully with the fudgy brownies. Add flaky sea salt on top for that sophisticated sweet-salty thing that makes grown-ups lose their minds.
Mint Chocolate Mummies
Add 1/4 teaspoon peppermint extract to your brownie batter and use white icing tinted with the tiniest drop of green food coloring. The mint-chocolate combination tastes like those fancy after-dinner chocolates, but in adorable mummy form. Top with broken mint candies for extra crunch and festive green spots that look like tiny emeralds against the chocolate.
Coffee-Infused Eye-Openers
Dissolve 1 tablespoon instant espresso powder in the melted butter before adding cocoa. The coffee doesn't make them taste like coffee — it just amplifies the chocolate flavor to eleven. Pipe your mummy bandages with white icing, then add coffee beans for eyes. These are dangerous because they taste so good people forget they're caffeinated and wonder why they're buzzing after dessert.
Orange Zest Jack-O-Lanterns
Stir in 2 teaspoons orange zest with the sugar for bright, citrusy notes that scream autumn. Pipe your icing in pumpkin faces instead of mummy bandages — triangles for eyes and noses, big grins for mouths. The orange oil in the zest naturally repels the chocolate's bitterness, creating a sophisticated flavor that pairs perfectly with hot apple cider.
Coconut Snow Mummies
Mix 1/2 cup shredded coconut into the batter for texture that tastes like a Mounds bar. After piping your mummy bandages, sprinkle toasted coconut over the top for "snowy" texture. The coconut oil in the shreds keeps the brownies extra moist while adding tropical notes that somehow work perfectly with the rich chocolate base.
Storing and Bringing It Back to Life
Fridge Storage
Store your iced mummy brownies in an airtight container with parchment paper between layers — the icing will stick to anything it touches like sugary superglue. They'll keep for up to five days in the fridge, though the icing might weep slightly from condensation. Let them come to room temperature for 30 minutes before serving — cold brownies taste less sweet and more bitter, while room temperature ones bloom with all their chocolate complexity. If your fridge smells like last week's leftovers, wrap the container in plastic wrap for extra protection against flavor transfer.
Freezer Friendly
These brownies freeze beautifully for up to three months, making them perfect for Halloween prep when you've got a million other things to do. Freeze them un-iced on a baking sheet first, then wrap individually in plastic wrap and foil. When you're ready to serve, thaw overnight in the fridge, then bring to room temperature and ice fresh. The texture stays perfect because the high fat content from the butter prevents ice crystals from forming and ruining that fudgy texture we worked so hard to achieve.
Best Reheating Method
If your brownies have dried out slightly (it happens to the best of us), revive them by wrapping in damp paper towel and microwaving for 8-10 seconds. The steam rehydrates them without making them soggy. For the ultimate indulgence, warm them slightly and serve with a scoop of vanilla ice cream — the contrast of warm fudgy brownie and cold creamy ice cream creates a dessert experience that makes people stop mid-conversation. Add a tiny splash of water to the container before microwaving day-old brownies — it steams them back to perfection without drying them out further.