Imagine this: you’re standing in your kitchen, the timer on the oven just hit zero, and the air is suddenly thick with the sweet, buttery perfume of chocolate melting into a caramel‑kissed embrace. I was in the middle of a frantic weekday, juggling a conference call and a toddler’s endless “why?” questions, when a sudden craving for something both comforting and daring struck me like a bolt of lightning. I raided the pantry, found a lonely bag of pecans, a half‑full chocolate chip stash, and thought, “What if I could make a cookie that’s as chewy as a good romance novel and as nutty as my favorite jazz playlist?” That moment turned into a culinary experiment that blew my expectations out of the water.
First, let’s set the scene: the kitchen lights are warm, the butter is soft enough to whisper, and the sugar crystals glisten like tiny diamonds waiting to dissolve into a glossy, golden pool. As you cream the butter and sugars together, you’ll hear that faint, satisfying hiss—like a tiny applause from the bowl—signaling the start of something magical. The aroma that rises is a heady mix of vanilla and caramel, the kind that makes you pause, close your eyes, and imagine a cozy cabin in the woods with a fire crackling nearby. And when you finally drop those glossy chocolate chips and buttery pecans in, you’ll feel a rush of excitement that’s almost as thrilling as the first bite of a perfectly baked cookie.
Now, why does this version stand out from every other chocolate chip pecan cookie you’ve ever tried? Most recipes either over‑bake, leaving you with a hard edge, or under‑mix, resulting in a crumbly mess that falls apart before it even reaches the plate. I’ve cracked the code by balancing the ratio of sugars, introducing a secret splash of vanilla, and mastering the art of the “rest‑and‑rise” technique that lets the dough develop flavor without turning into a flat pancake. The result? A cookie that’s chewy in the center, crisp at the edges, and packed with pockets of melted chocolate that ooze like molten gold.
And here’s the kicker: I’m about to reveal a technique most bakers overlook—a short chill of the dough before the first bake that creates those coveted, slightly caramelized edges while keeping the middle soft as a cloud. Trust me, this little trick is the difference between “good” and “hands down the best version you’ll ever make at home.” I dare you to taste this and not go back for seconds. Let me walk you through every single step — by the end, you’ll wonder how you ever made it any other way.
What Makes This Version Stand Out
- Chewy Core: The balanced blend of granulated and brown sugar creates a moist interior that stays soft long after the cookies cool, giving you that irresistible chew every bite.
- Crunchy Edge: A short chill before baking and a precise bake time coax the edges into a crisp, caramel‑kissed shell that shatters like thin ice under your teeth.
- Nutty Depth: Toasted pecans add a buttery crunch and a subtle earthiness that elevates the flavor profile beyond ordinary chocolate chip cookies.
- Flavor Boost: Two teaspoons of pure vanilla extract amplify the sweet notes, making the chocolate taste richer and the dough more aromatic.
- Simplicity: With just ten pantry staples, you won’t need any exotic ingredients or fancy gadgets—just confidence and a whisk.
- Crowd‑Pleaser: Whether it’s a family gathering, a potluck, or a midnight snack, these cookies have a proven track record of disappearing within minutes.
- Make‑Ahead Magic: The dough can be frozen for up to a month, so you can always have a batch ready for any spontaneous craving.
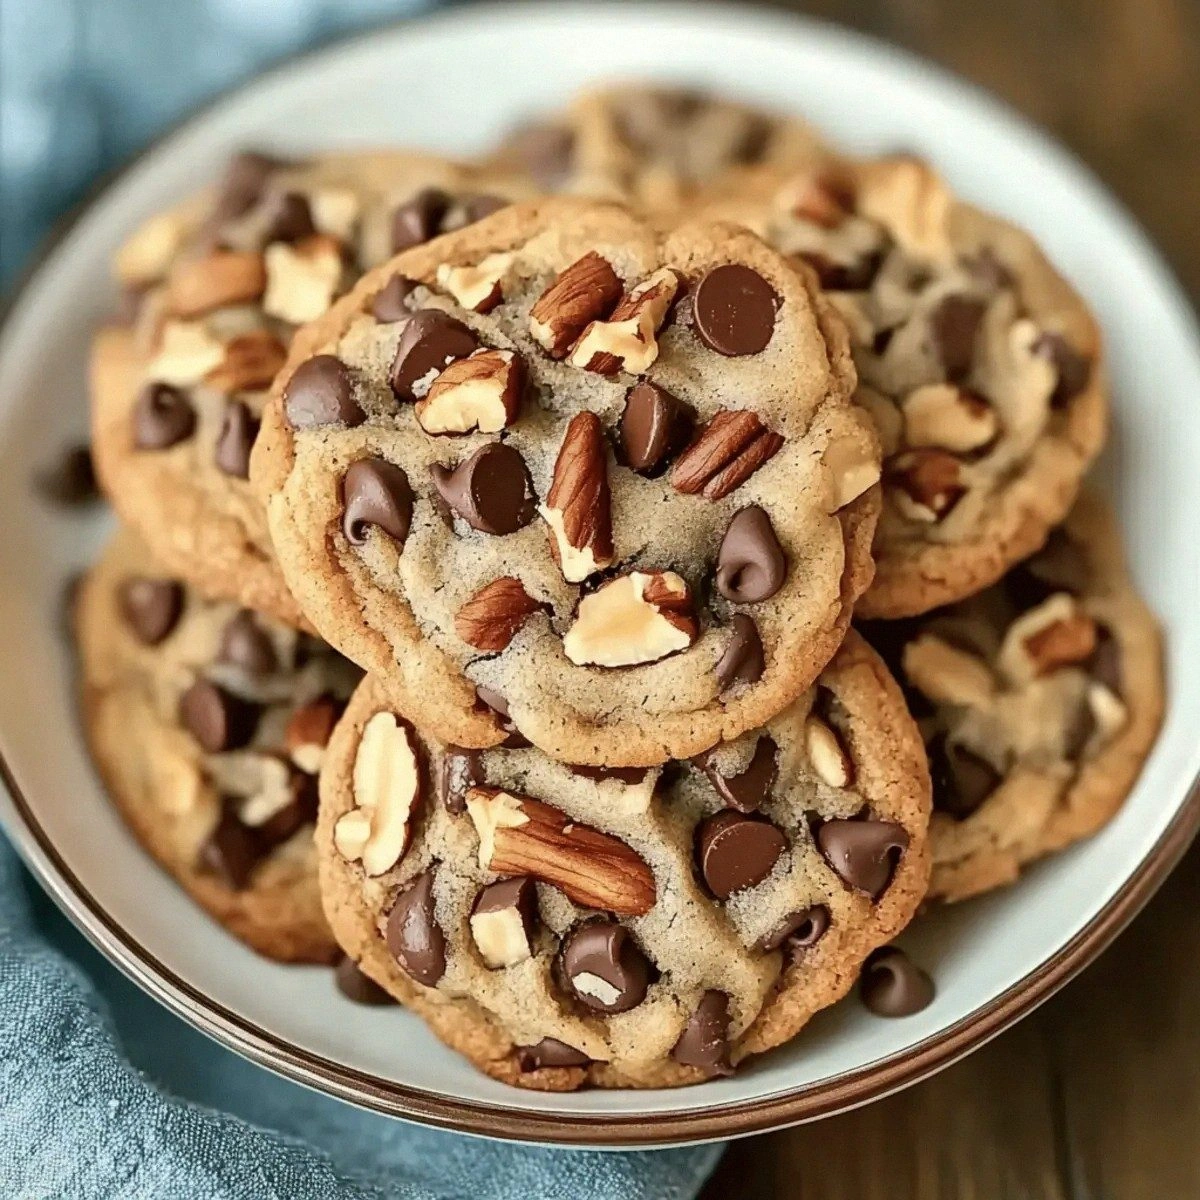
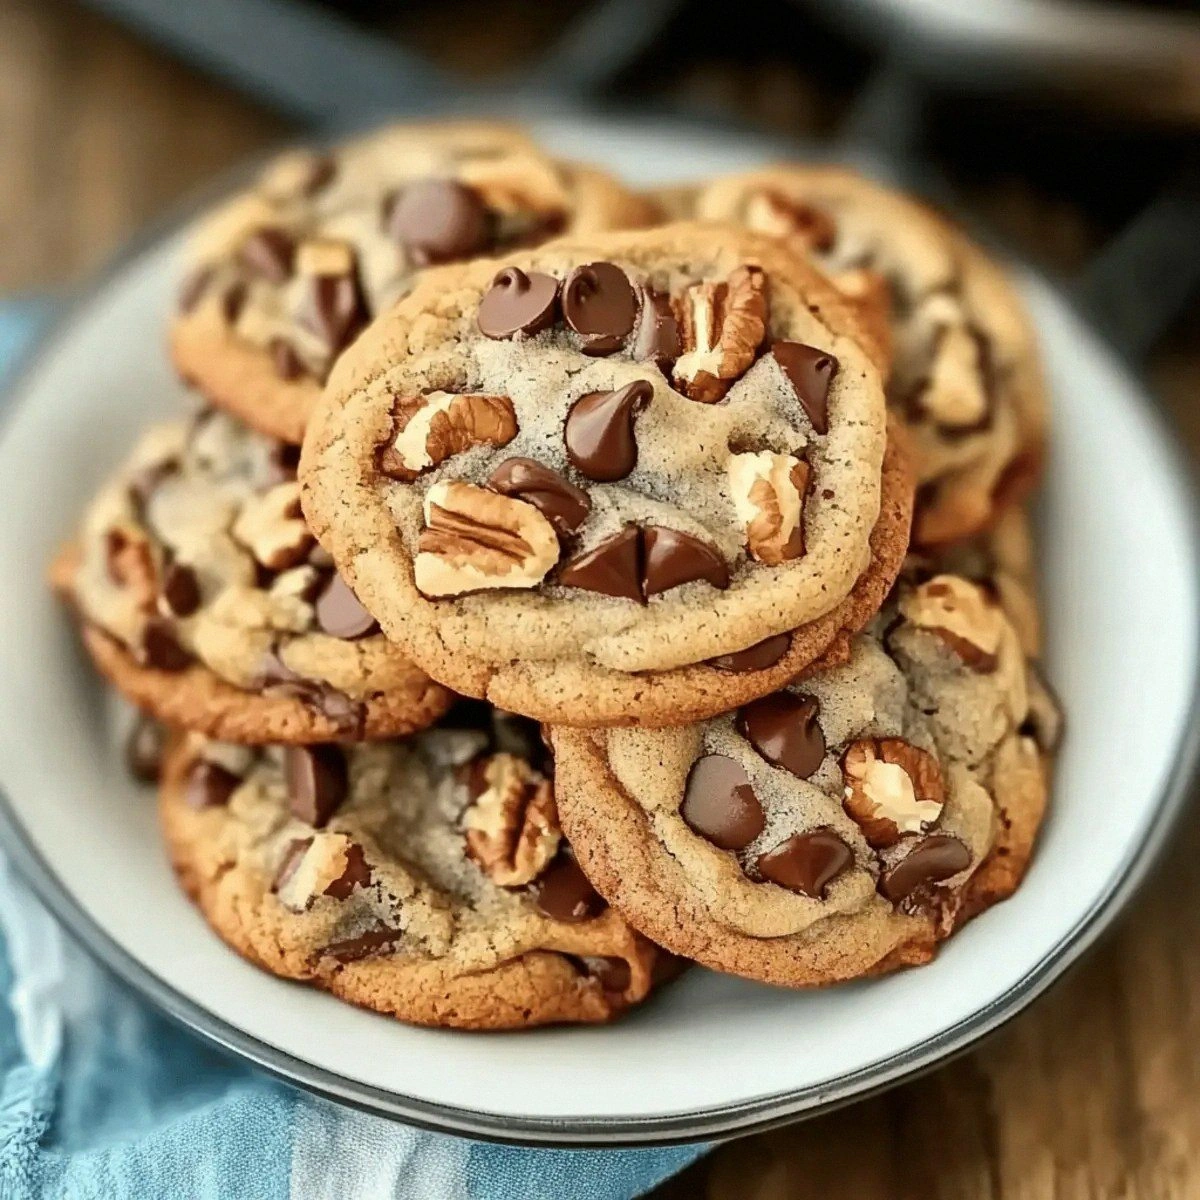
- Visual Appeal: The speckled pecan pieces and glossy chocolate chips create a rustic, homemade look that’s Instagram‑ready without the effort.
Inside the Ingredient List
The Flavor Base
Unsalted butter is the foundation of any great cookie, providing richness and a tender crumb. I use a full cup of softened butter because it emulsifies perfectly with the sugars, creating that glossy, velvety texture we all crave. If you ever skip the butter or replace it with margarine, you’ll notice a greasy aftertaste and a lack of depth that no amount of chocolate can fix. For the best flavor, opt for European‑style butter with a higher butterfat content; it melts slower and yields a more decadent mouthfeel.
Granulated sugar adds sweetness and contributes to the cookie’s structure, while light brown sugar introduces moisture and a subtle caramel note. The combination of one cup each is a sweet spot that prevents the cookies from becoming overly crisp or too soft. If you decide to swap brown sugar for dark brown, expect a deeper molasses flavor that can sometimes overpower the delicate vanilla and pecan notes.
The Texture Crew
Two large eggs act as binders, providing structure while also adding a hint of richness. Eggs also help with leavening when combined with baking soda, giving the cookies that gentle lift without making them cake‑like. If you’re avoiding eggs, you can substitute with a flax‑egg (1 tablespoon ground flaxseed + 3 tablespoons water) but expect a slightly denser texture.
All‑purpose flour is the backbone that holds everything together. I use 2.5 cups to achieve a perfect balance between chewiness and structure. Adding too much flour will result in a dry, crumbly cookie, while too little will cause spreading and thinness. For a gluten‑free version, replace the flour with a 1:1 blend of rice flour and tapioca starch, but be aware the texture will be a bit more delicate.
The Unexpected Star
Salt isn’t just a flavor enhancer; it amplifies the sweetness and balances the richness of butter and chocolate. A single teaspoon is enough to bring everything into harmony without making the cookies taste salty. If you’re on a low‑sodium diet, you can cut the amount in half, but you’ll lose a bit of that flavor complexity.
Baking soda is the secret leavening agent that creates the slight rise and helps the cookies spread just enough to get those coveted thin edges. One teaspoon is precise—any more and you’ll end up with a metallic aftertaste. Always double‑check that your soda is fresh; an old can loses its potency, leaving the cookies flat.
The Final Flourish
Semi‑sweet chocolate chips are the heart of this recipe, providing sweet‑bitter bursts that melt into gooey pockets. Two cups ensure every bite is studded with chocolate goodness. If you’re a dark chocolate lover, swap half the chips for bittersweet; just remember the overall sweetness will drop slightly.
Chopped pecans bring a buttery crunch and a nutty aroma that complements the chocolate beautifully. One cup of roughly chopped pecans is ideal; too many and the cookies become overly dense, too few and you lose that satisfying crunch. Toast the pecans lightly before adding them to the dough for an extra layer of flavor—this step is a game‑changer.
Everything's prepped? Good. Let's get into the real action...
The Method — Step by Step
Start by preheating your oven to 350°F (175°C) and lining two baking sheets with parchment paper. While the oven warms up, place the butter in a large mixing bowl and beat it on medium speed until it turns pale and fluffy—this should take about 2–3 minutes. The mixture should look like a cloud of sunshine, and you’ll hear a soft, rhythmic whir of the mixer that signals it’s ready for sugar.
Gradually add the granulated sugar and light brown sugar, one cup at a time, beating after each addition. Watch the bowl transform into a glossy, caramel‑colored swirl; that’s the sugar dissolving and creating a tender matrix for the dough. This step? Pure magic. As the sugars incorporate, they’ll emit a faint, sweet aroma that fills the kitchen and makes you want to taste the batter right away.
Kitchen Hack: Sprinkle a pinch of sea salt into the sugar‑butter mixture before beating; it helps the sugars dissolve more evenly and prevents graininess.Drop in the two teaspoons of vanilla extract and the two large eggs, one at a time, beating on low speed after each egg. The dough should look smooth and slightly thick, with the eggs fully integrated—no streaks of yellow should be visible. If you see any pockets of egg white, keep mixing a few seconds longer; the goal is a homogenous batter that will bake evenly.
In a separate bowl, whisk together the all‑purpose flour, baking soda, and salt. This dry blend ensures the leavening agent is evenly distributed, preventing any bitter soda pockets. Slowly pour the dry mixture into the wet ingredients, mixing on low until just combined. Over‑mixing here will develop gluten and make the cookies tough, so stop as soon as you no longer see flour streaks.
Fold in the chocolate chips and chopped pecans with a sturdy spatula, turning the dough over on itself a few times. You’ll notice the chips and nuts sinking into the batter, creating little islands of flavor waiting to burst out when baked. And now the fun part. Let the dough rest on the counter for 5 minutes; this brief pause lets the gluten relax, which contributes to that coveted chew.
Watch Out: If you over‑fold, the dough can become overly airy, leading to flat, crispy cookies instead of chewy ones.Cover the bowl with plastic wrap and place it in the refrigerator for at least 30 minutes, or up to 2 hours. This chilling step is crucial—it solidifies the butter, which prevents excessive spreading, and allows the flavors to meld. While you wait, you can prep the baking sheets, line them, and pre‑heat the oven if you haven’t already.
After chilling, scoop the dough onto the prepared sheets using a medium cookie scoop (about 2 tablespoons per cookie). Space them roughly 2 inches apart; this gives them room to spread without merging. The dough balls should be smooth and slightly rounded—if they look a bit flat, give them a quick pat with your fingers to restore shape.
Slide the sheets into the preheated oven and bake for 10‑12 minutes, or until the edges turn a light golden brown while the centers remain soft. You’ll notice the cookies puff slightly and the chocolate chips beginning to melt, creating that glossy sheen on top. Keep an eye on the color; over‑baking even by a minute can turn a chewy cookie into a crunchy one.
Once baked, remove the sheets from the oven and let the cookies rest on the pans for 3 minutes. This short rest lets the cookies set, making them easier to transfer without breaking. Then, move them to a wire rack to cool completely. As they cool, the edges will firm up while the centers stay irresistibly soft—trust me, that contrast is the hallmark of perfection.
That's it — you did it. But hold on, I've got a few more tricks that'll take this to another level...
Insider Tricks for Flawless Results
The Temperature Rule Nobody Follows
Most bakers recommend room‑temperature butter, but I swear by slightly chilled butter (just out of the fridge for 10 minutes). This tiny temperature dip prevents the dough from becoming too soft, which in turn controls spread and ensures those coveted thick, chewy centers. I once tried using fully softened butter and ended up with flat, crispy discs that tasted like over‑cooked crackers. Trust the chill; it’s the secret behind the perfect cookie silhouette.
Why Your Nose Knows Best
Don’t rely solely on a timer—use your sense of smell as a guide. When the cookies are about 2 minutes from the suggested bake time, the kitchen will fill with a nutty, caramel scent that’s unmistakable. If the aroma is strong and the edges look set, pull them out early; they’ll continue to bake slightly on the hot pan. Over‑reliance on the clock can lead to over‑baked cookies that lose that coveted chew.
The 5‑Minute Rest That Changes Everything
After mixing, let the dough rest for at least five minutes at room temperature before chilling. This pause allows the gluten strands to relax, which translates into a softer crumb and prevents the cookies from becoming tough. I once skipped this step in a rush and ended up with a batch that felt more like a shortbread than a chewy cookie. The rest is a small price to pay for that melt‑in‑your‑mouth texture.
Butter Temperature Magic
When you beat butter with sugar, aim for a “creamy sunrise” stage—where the mixture looks pale, fluffy, and a touch glossy. If you stop too early, the sugar won’t fully dissolve, leading to grainy spots. If you go too far, the butter can separate, causing a greasy finish. The perfect beat is a delicate balance, and you’ll know it when the bowl feels light and the mixture lifts easily.
Cookie Sheet Secrets
Heavy‑duty aluminum sheets conduct heat more evenly than thin, cheap ones, giving you a uniform bake. I also recommend a light dusting of cornmeal on the parchment; it adds a subtle crunch and prevents sticking without altering flavor. If you’re using a silicone mat, lower the oven temperature by 10°F to avoid over‑browning on the bottom.
Creative Twists and Variations
This recipe is a playground. Here are some of my favorite ways to switch things up:
Salted Caramel Swirl
Swirl in a tablespoon of caramel sauce into the dough before chilling, then sprinkle flaky sea salt on top just before baking. The salty‑sweet combination adds a sophisticated depth that turns a simple cookie into a dessert masterpiece.
Double Chocolate Delight
Replace half of the semi‑sweet chips with dark chocolate chunks and add a teaspoon of cocoa powder to the dry ingredients. The result is a richer, more intense chocolate experience that satisfies even the most devoted chocoholics.
Nutty Crunch Upgrade
Mix in toasted walnuts or almonds alongside the pecans for a multi‑nut texture. Toasting the nuts brings out a buttery aroma that pairs beautifully with the chocolate, creating a layered crunch in every bite.
Coffee Infused
Dissolve a tablespoon of instant espresso powder in the vanilla extract before adding it to the batter. The subtle coffee notes enhance the chocolate flavor, giving the cookies an adult‑friendly twist that’s perfect for after‑dinner indulgence.
Holiday Spice
During the festive season, add a pinch of cinnamon, nutmeg, and a dash of clove to the flour mixture. The warm spices meld with the pecans and chocolate, creating a comforting, holiday‑ready cookie that pairs wonderfully with hot cocoa.
Storing and Bringing It Back to Life
Fridge Storage
Place cooled cookies in an airtight container with a paper towel at the bottom to absorb excess moisture. Store them in the refrigerator for up to a week; the cool environment preserves the chew while keeping the chocolate from blooming.
Freezer Friendly
Layer cookies between sheets of parchment paper and seal the container tightly before freezing. They’ll stay fresh for up to three months. When you’re ready, let them thaw at room temperature for 15 minutes, then pop them in a 300°F oven for 5 minutes to revive that fresh‑out‑the‑oven texture.
Best Reheating Method
To bring a cookie back to life, place it on a microwave‑safe plate, sprinkle a tiny splash (about a teaspoon) of water beside it, and microwave for 10‑12 seconds. The steam generated restores softness without making the cookie soggy—a trick that works like a charm every time.