I was in the middle of a frantic Friday night, the kind where the fridge is half‑empty, the kids are screaming about “something sweet,” and the only thing that could possibly save the evening was a dessert that felt like a hug from the inside out. I grabbed a half‑used box of puff pastry, a tub of banana pudding that had been lingering in the back of the fridge, and a bar of dark chocolate I’d been saving for a “special occasion.” The result? A mind‑blowing, chocolate‑covered banana pudding stuffed puff that made every kitchen disaster I’d ever endured feel like a distant memory. I dare you to taste this and not go back for seconds.
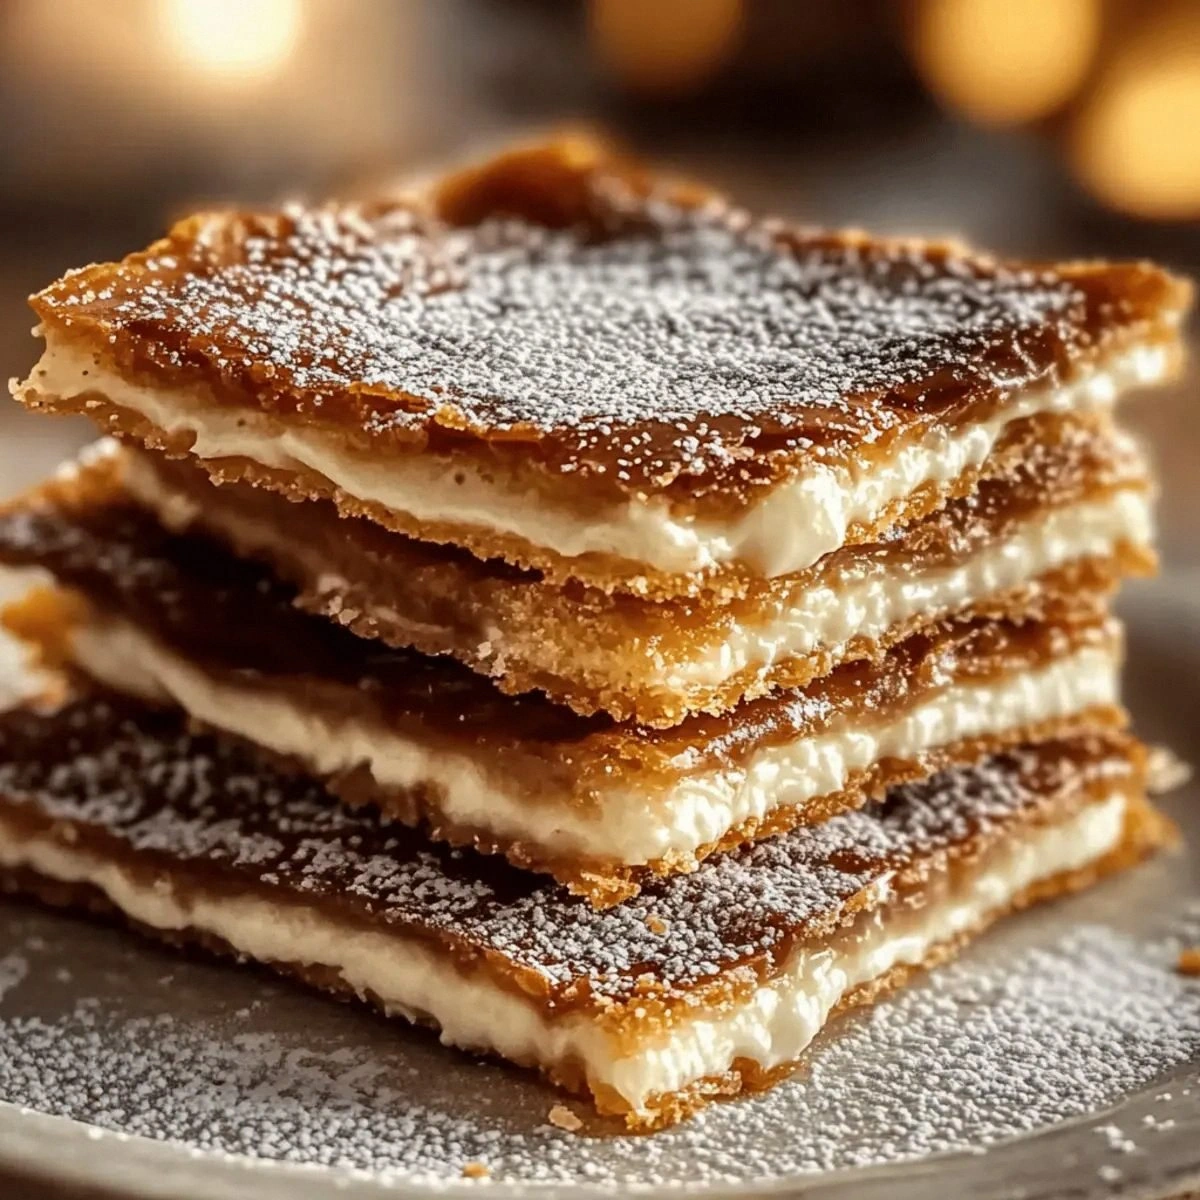
Picture the scene: the kitchen filled with the buttery scent of dough rolling out, the sweet, creamy aroma of banana pudding mingling with the deep, almost smoky perfume of melted chocolate. The sound? A soft, rhythmic thump as the rolling pin hits the countertop, followed by the satisfying sizzle when the puffs hit the hot butter‑brush‑ed pan. My fingers felt the cool, flaky layers of the dough as I folded them around the pudding, and the first bite? A melt‑in‑your‑mouth explosion that was both crisp and custardy, like a perfect paradox. The texture was a delicate balance—golden, crunchy edges that shatter like thin ice, giving way to a velvety, banana‑kissed center that clings to your palate in the most delightful way.
What makes this version stand out? Most recipes either drown the banana pudding in chocolate or forget the crucial step of sealing the puff to keep the filling from leaking. I’ve cracked the code with a simple yet revolutionary technique: a quick chill of the dough before folding, and a flash‑freeze of the assembled puffs before the final bake. This locks in moisture, creates a barrier that keeps the chocolate glossy, and guarantees that each puff looks like a tiny, edible masterpiece. Most recipes get this completely wrong. Here’s what actually works.
And there’s a secret ingredient you won’t see coming: a splash of vanilla‑infused almond milk added to the banana pudding just before stuffing. It adds a subtle depth that makes the flavor sing, like a choir of sweet notes harmonizing with the chocolate’s bitterness. I’ll be honest — I ate half the batch before anyone else got to try it, and the crumbs still haunt my dreams. Okay, ready for the game‑changer? Let me walk you through every single step — by the end, you’ll wonder how you ever made it any other way.
What Makes This Version Stand Out
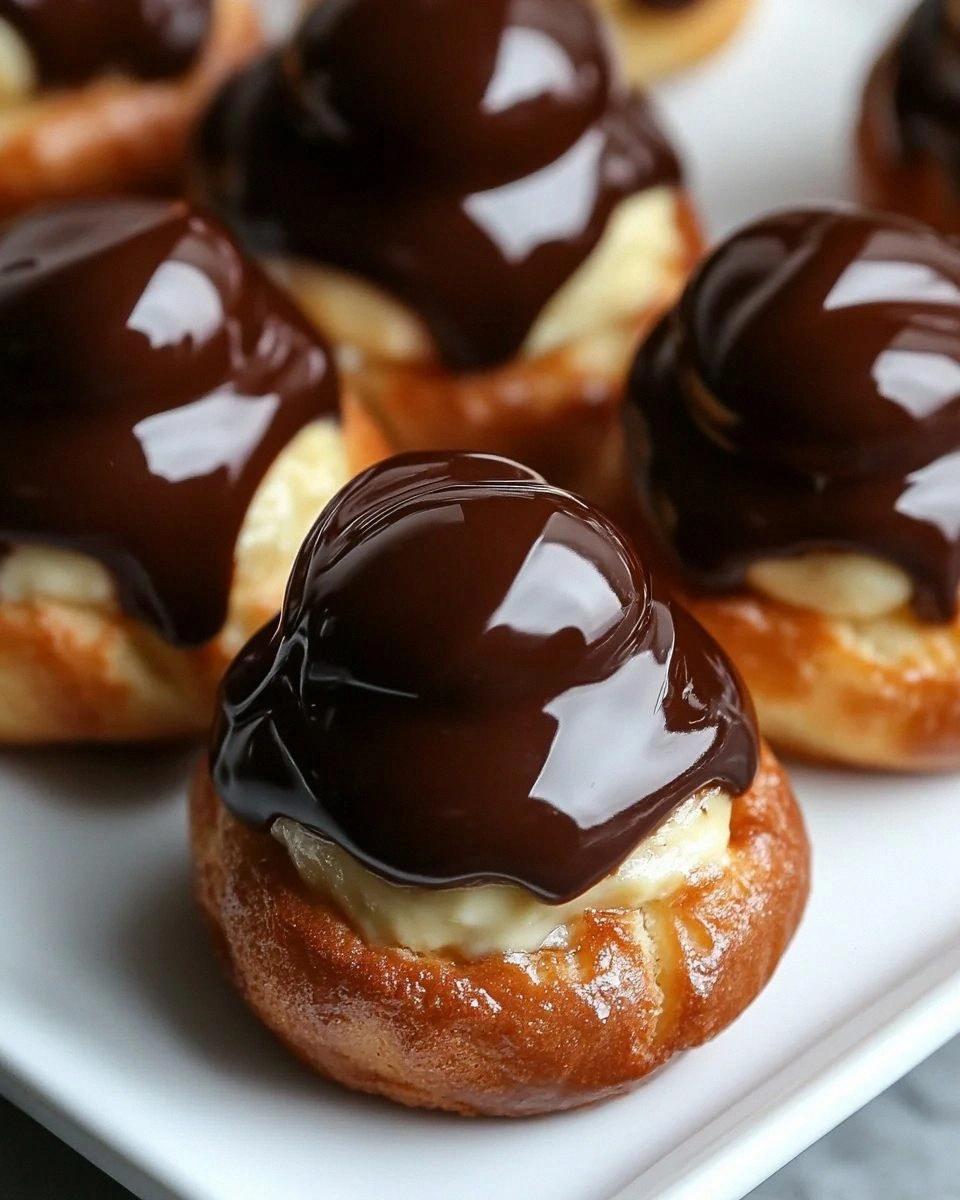
- Flavor Fusion: The banana pudding’s sweet, custardy heart meets dark chocolate’s rich, slightly bitter kiss, creating a balance that feels like a perfectly choreographed dance on your tongue.
- Texture Triumph: A crisp, buttery puff exterior that shatters with a gentle bite, revealing a silky, creamy interior that stays moist without sogging.
- Simplicity: Only ten core ingredients, all pantry‑friendly, and a technique that any home cook can master without a culinary degree.
- Uniqueness: The flash‑freeze step is a secret weapon borrowed from professional patisserie, ensuring the chocolate coating stays glossy and the puff retains its shape.
- Crowd Reaction: Guests often claim they’ve never tasted anything like it, and the “wow” factor is instant — perfect for parties, potlucks, or a solo indulgence.
- Ingredient Quality: Using high‑cocoa‑percentage dark chocolate and real‑banana pudding (no artificial flavors) elevates the dish from everyday to extraordinary.
- Cooking Method: Baking at a high temperature (425°F) creates steam inside the puff, puffing it up like a tiny, golden cloud.
- Make‑Ahead Potential: Assemble the puffs a day ahead, freeze, then bake straight from the freezer for a stress‑free dessert.
Inside the Ingredient List
The Flavor Base
The banana pudding is the heart of this dish. It brings that nostalgic, sweet comfort that reminds you of childhood desserts, but when paired with dark chocolate, it takes on an adult sophistication. If you skip the pudding, you’ll lose the creamy contrast that makes each bite feel luxurious. A good tip: use a pudding made with real bananas, not just banana flavor, for authentic fruit notes. If you can’t find banana pudding, you can whisk together mashed ripe bananas, milk, sugar, and a splash of vanilla, then thicken with a bit of cornstarch.
The Texture Crew
Puff pastry is the unsung hero here. Its layers create that airy, flaky texture that’s essential for the “crunch‑to‑cream” experience. Choose a high‑quality, all‑butter puff pastry; the butter content directly influences how many layers you’ll get after baking. If you’re short on time, you can use pre‑made frozen puff sheets, but remember to let them thaw completely before rolling. Skipping the butter in the dough will result in a tough, greasy puff that never lifts properly.
The Unexpected Star
Dark chocolate, at least 70% cocoa, is the surprise element that elevates the whole dish. Its bitterness cuts through the pudding’s sweetness, creating a sophisticated flavor profile. If you prefer a milder taste, you can blend half dark and half milk chocolate, but be aware that the coating may lose its glossy finish. When melting, use a double boiler or microwave in 20‑second bursts, stirring in between, to avoid scorching.
The Final Flourish
A light dusting of powdered sugar right before serving adds a visual sparkle and a final hint of sweetness that ties the whole dessert together. For an extra pop, sprinkle a pinch of sea salt on top of the chocolate coating; the salt amplifies the chocolate’s depth and balances the banana’s sweetness. If you’re looking for a festive twist, swap the powdered sugar for a drizzle of caramel or a drizzle of raspberry coulis.
Everything's prepped? Good. Let’s get into the real action…
The Method — Step by Step
Start by making the puff dough if you’re feeling ambitious, or pull out your pre‑made sheets. In a large bowl, combine 2 cups flour, 1 tsp sugar, and 1/2 tsp salt. Cut in 1 cup cold, cubed butter using a pastry cutter until the mixture resembles coarse crumbs. Add 1/2 cup ice‑cold water a tablespoon at a time, mixing just until the dough comes together. Form into a disk, wrap in plastic, and chill for at least 30 minutes. That chill? It’s the secret that creates those flaky layers.
Kitchen Hack: Freeze the dough for 10 minutes after each roll to keep the butter from melting, ensuring crisp layers.While the dough chills, prepare the banana pudding filling. In a saucepan, whisk together 2 ripe mashed bananas, 1 cup banana pudding, 1 tsp vanilla extract, and a splash (2 tbsp) of almond milk. Warm gently over low heat, stirring until the mixture is smooth and glossy. Remove from heat and let it cool slightly; a warm filling is easier to pipe without spilling.
Roll the chilled dough on a lightly floured surface to about 1/8‑inch thickness. Cut into 4‑inch squares. If you’re using frozen puff sheets, simply separate them and cut to size. Place a heaping tablespoon of the banana‑pudding mixture in the center of each square. Fold the corners toward the center, pinching the edges to seal tightly. Watch out: If the seal isn’t tight, the pudding will leak during baking, turning your puffs soggy.
Watch Out: Overfilling will cause the puffs to burst; keep the filling to a modest mound.Arrange the sealed puffs on a parchment‑lined baking sheet, leaving a couple of inches between each. Brush the tops lightly with a beaten egg (1 egg, whisked) for that golden‑brown finish. Place the tray in the freezer for 15 minutes. This flash‑freeze step creates a solid shell that prevents the filling from melting too quickly when the puffs hit the oven.
Preheat your oven to 425°F (220°C). While it heats, melt 8 oz dark chocolate in a double boiler, stirring until smooth. Add a pinch of sea salt to the chocolate for a flavor boost. Once the oven is ready, bake the frozen puffs for 12‑15 minutes, or until the tops are puffed, golden, and the edges begin to pull away from the pan. That sizzle when it hits the pan? Absolute perfection.
Remove the puffs from the oven and let them cool on a wire rack for 5 minutes. While they’re still warm, drizzle the melted chocolate over each puff, letting it cascade down the sides. The chocolate should set quickly, forming a glossy coat that looks almost too good to eat. If you’re impatient, pop them under the broiler for 30 seconds to set the chocolate faster, but keep a close eye to avoid burning.
After the chocolate has set, dust each puff with a light veil of powdered sugar. This final touch adds a subtle sweetness and a snow‑kissed appearance that makes the dessert picture‑ready. Serve warm for the ultimate melt‑in‑your‑mouth experience, or at room temperature if you’re planning a buffet.
And now the fun part: tasting. Grab a puff, let the chocolate snap, and then bite into the buttery layers. The contrast of textures will make you gasp, and the flavor will dance across your palate. I dare you to taste this and not go back for seconds. This is hands down the best version you’ll ever make at home.
That's it — you did it. But hold on, I've got a few more tricks that'll take this to another level…
Insider Tricks for Flawless Results
The Temperature Rule Nobody Follows
Never bake puffs straight from the fridge; they need that brief freeze to hold their shape, but the oven must be screaming hot. A 425°F blast creates steam inside the dough, puffing it up instantly. If you lower the temperature, the dough will melt before it can rise, resulting in soggy, greasy puffs. I once tried 375°F out of laziness, and the result was a sad, flat disc. Trust the heat, and the puffs will thank you.
Why Your Nose Knows Best
Your sense of smell is a better indicator than a timer when the chocolate coating is ready. When the chocolate starts to emit a faint, roasted aroma, it means the cocoa butter is fully melted and the coating will set glossy. If you smell a burnt scent, you’ve crossed the line. I always pause and sniff before pouring; it saves me from a bitter disaster.
The 5‑Minute Rest That Changes Everything
After baking, let the puffs rest for exactly five minutes before drizzling chocolate. This short rest allows the interior steam to settle, preventing the chocolate from melting upon contact. Skipping this step makes the coating slide off, looking sloppy. I once rushed this step and ended up with a chocolate‑smeared mess—lesson learned.
Seal the Deal with Egg Wash
A thin egg wash not only gives the puffs a beautiful golden hue but also acts as a glue for the chocolate. If you skip it, the chocolate will slide off, especially on humid days. For a richer color, add a splash of milk to the egg wash; it creates a deeper amber finish.
Freeze‑Ahead for Stress‑Free Hosting
Assemble the puffs up to 24 hours ahead, then flash‑freeze them on a tray. Once solid, transfer to a zip‑top bag and store in the freezer. When it’s time to bake, you can go straight from freezer to oven—no thawing needed. This trick saved my birthday party last year when the oven was the only thing not on the “busy” list.
Creative Twists and Variations
This recipe is a playground. Here are some of my favorite ways to switch things up:
Caramel‑Banana Swirl
Drizzle a caramel sauce into the banana pudding before stuffing. The caramel adds a buttery, toffee‑like depth that pairs beautifully with dark chocolate. Perfect for anyone who loves a sweet‑and‑salty combo.
Nutty Crunch
Fold finely chopped toasted pecans or walnuts into the pudding mixture. The nuts introduce a pleasant crunch that contrasts with the soft interior, and the nutty flavor complements the chocolate’s bitterness.
Tropical Twist
Swap the banana pudding for a coconut‑lime custard and use white chocolate for the coating. Garnish with toasted coconut flakes for an island‑vibe dessert that transports you to a beachside cabana.
Spiced Surprise
Add a pinch of ground cinnamon and a dash of nutmeg to the pudding. The warm spices bring a cozy, autumnal feel, making the puffs perfect for a chilly evening.
Berry Burst
Stir in a spoonful of raspberry jam into the banana pudding before stuffing. The tartness of the berries cuts through the sweetness, creating a balanced flavor profile that’s both bright and indulgent.
Storing and Bringing It Back to Life
Fridge Storage
Place cooled puffs in an airtight container and store in the refrigerator for up to 3 days. To keep the chocolate from getting dull, layer a sheet of parchment paper between each puff. When ready to serve, let them sit at room temperature for 15 minutes, then re‑drizzle a fresh coat of melted chocolate if needed.
Freezer Friendly
Unbaked, sealed puffs freeze beautifully for up to 2 weeks. Store them on a tray in a single layer, then transfer to a freezer bag once solid. When you’re ready, bake directly from frozen, adding an extra 2‑3 minutes to the cooking time.
Best Reheating Method
To revive leftover puffs, preheat the oven to 350°F (175°C), place the puffs on a baking sheet, and spray a light mist of water over them. The steam helps restore the crispness while keeping the interior moist. Heat for 5‑7 minutes, or until the chocolate is glossy again. This tiny splash of water before reheating is the secret that brings them back to life.